First take a look at one of the most shocking videos in the world! This video actually shows us what the secret of the Trump family is related to their expressive health!!! –FULL VIDEO HERE
Back in 1949 the world was still recovering from World War II. The Korean War wouldn’t start for another year, but George Orwell was already focused on the dangers of communism and the totalitarianist government it builds. World War II was started by totalitarian governments; but worse than that was how such governments treat the citizens living under their control.
In his book 1984, the government, encapsulated in the persona of “Big Brother,” knew everything about everyone; where they were, what they were doing and even what they were thinking much of the time. This was used to keep control of people to an extreme that even the now defunct Soviet Union couldn’t reach. Yet with modern technology, the reality of such a government could very well be forming around us and we don’t even see it happening.
As we know, the government is actively spying on every one of us. That’s the essence of Edward Snowden’s message, since he left the employ of the NSA. While that spying is intended to help prevent terrorism, we’ve seen some in government be awfully free in their use of that term. One can quickly find themselves labeled as a terrorist if the political winds blow the wrong way.
The US Army’s Forgotten Food Miracle and 126 Superfoods That You Can Store Without Refrigeration for Years
The video below will shock you because you will be among the first to watching this secret!
On top of the NSA, big tech is in cahoots with government in a number of ways, most especially with providing information to law enforcement officers, as they seek to solve crimes. But that same information which is being used for the good of tracking down and convicting criminals can very well be used against the rest of us. After all, any of us can become an instant felon, simply by Congress passing a law making something that has been legal, suddenly illegal.
An excellent case in point is the current push by Democrats to restrict our Second Amendment rights. Should they do that, then millions of law-abiding citizens will suddenly be faced with the option of turning in valuable firearms or hiding them from the government. Will the government hunt down those who haven’t turned in their guns, using the same tools they are currently using to track down criminals? Only time will tell.
So, what can we do to keep the government from having an idea where we are and what we are doing? To start with, we need to understand that the government has multiple means of tracking us, not just one or two. That means we’re going to have to defeat them all, if we expect to protect ourselves from electronic spying.
Here are a few places to start.
Use a Burner Phone
The easiest way for the government to track any of us is through our smartphone. We really don’t have a handle on everything that our phones are doing in the background, while we’re not looking.
Yet there’s nearly constant communication between our phones and the local cell phone tower.
It’s clear that the communications we have through our phones is readily available to the NSA and others.
You can even pay online services to do a little spying on family members, seeing their text messages, who they’ve talked to, what they’ve looked at online and where they’ve been. If you and I can do this, then you can be sure the government can do more.
Shut Off GPS Tracking
One of the most common ways our phones help the government keep track of us is through the phone’s GPS. Google and Apple keep track of our every move through that part of the phone.
If you go to Google Maps and click on your timeline in the menu, it will show you everywhere you’ve been, for the last several years.
This feature alone could put you in danger if you just happen to be in the same place that a crime was committed. While that alone wouldn’t be enough to convict you; it would be enough to make you a suspect.
And that’s just one example of how the GPs could be used against you. What if they want to track you down because it has been reported that you said something against the government; they’d have no trouble tracking you down.
Clean Out Internet Browsing Activity and Cookies
One of the big ways that companies use the internet to keep tabs on us is through our browsing history and the cookies downloaded to our computers by the various websites we visit.
A lot can be learned about who we are and what we do by looking at that. That’s why major corporations invest so much in data mining, looking for people to buy their products.
Haven’t you seen how you can look at something online, then find advertisements for the same sort of product showing up in your Facebook feed and just about any online article you read?
That information is also admissible in court as a means of defining your character. Government prosecutors could build a totally false narrative about you as a terrorist or planning mass murder, backed up by no more than the websites you have visited. Simple curiosity can and will be used against you, perhaps even in a court of law.
Get Rid of Alexa, Siri, and other Voice-recognition Assistants
One of the key elements of Orwell’s imaginary society in 1984 was that the government was tracking what everyone was doing through their television sets.
Yet today, rather than the government having to hide that capability in our TV sets, we buy devices and use them in our homes.
Those devices track everything we do, listening in on our conversations, so that they can “serve us” better.
Employees of those companies have come forth, confessing how employees at big tech companies listen in on people’s private lives.
If they’re doing it, then the government has access to it too. Remember, everything that device does goes over the internet and the NSA is tapped into that thoroughly.
EXPOSED: Free Power Secrets! Revealed: The century-old device making solar panels obsolete. Embrace efficient, sustainable energy. Open the Gates of Innovation!
Create Alternative e-Mail Accounts for Memberships
Our online identity is largely tied into our e-mail account.
Pretty much everything you sign up for, from buying dog food to looking at different sites, involves creating an account using that e-mail address. That online presence can lead government agents to look into all areas of your online existence.
The solution is to create multiple ‘personas,’ utilizing them for different things.
In order to do this, you’re going to have to provide false information at some point, as pretty much all e-mail services try to verify that you’re a real person and that you’re who you say you are.
Create Site-specific Passwords
Passwords are the bane of modern existence, with more and more websites requiring a membership and password for access. Even those that don’t are likely to require you setting up an account to buy anything.
The information attached to that account Is just one more source for the government to look at.
Most of us pick a password and use it for as much as we can. The problem with that is that once someone figures out your password, they can try it on a variety of different platforms, trying to access your account and see what you’ve been doing.
Four different products, bought from different vendors, could easily become the parts of a bomb in some investigator’s imagination.
Avoid JavaScript
JavaScript abounds throughout the internet, having been created to make it possible for web pages to be interactive.
Unfortunately, it’s full of security holes, having been created many of the more modern modes of hacking were invented. Today, breaking into JavaScript is considered small potatoes by hackers.
Keep in mind that the government employs hackers too; they’re called “white hat hackers,” and while that term was originally coined in regards to people who were trained in hacking in order to play the “red team” in online security simulations, it’s used for any hacker who does their work as part of “legitimate” business.
Of course, as far as the government is concerned, anything they do is legitimate, regardless of what the law says.
Encrypt e-Mail
We’ve already discussed how the NSA is recording and reading every bit of communications that flows across the internet. That includes your e-mail. They know if you’re making an inquiry about buying a new home, having an online affair or discussing business secrets.
According to Snowden, some of those government employees are looking over people’s shoulders, watching their lives as if it were a live soap opera.
The world’s best code breakers work for the NSA and the majority of the world’s supercomputers are housed in their facilities. So the idea that they can’t break into an encrypted e-mail is ridiculous. Nevertheless, encrypting still makes it harder, meaning that they’d have to have a pretty good reason to bother.
While not perfect, encrypting your e-mail at least protects you from casual view.
Avoid Online, Credit Card and Debit Card Purchases
Probably one of the earliest ways that law enforcement used the benefits of the internet to solve crimes is through tracking credit card use. We’ve all seen cop shows where they tracked a suspect by looking at where they were using their credit card. That’s child’s play for the government today.
Of course, the government isn’t the only one tracking our online purchases, although I don’t think that companies have the ability to get into the records of our credit and debit card usage like the government can.
Either way, it can provide the government with a lot of information that you might not want them to know. Better to use cash and keep your transactions anonymous.
If you’ve got to buy things online, then use prepaid Visa and MasterCard gift cards, not associated with any bank account you have.
You can buy these easily at the checkout in many major stores, in denominations up to $500. That makes it possible to make a lot of purchase anonymously.
Then have the item shipped to an address that can’t be readily traced to you, like a PO box that you rented using a false address.
Don’t Fill Out Profile Data
One of the easiest ways for the government, criminals, companies and just about anyone else has of getting information about any of us is through our online profiles.
Social media has encourages people to live an open life, with everything about them becoming common knowledge. But that information can become dangerous if it gets into the wrong hands.
Save that information, so that you can give it to who you want to, rather than whoever wants it.
While it might not be quite as “neighborly” in the online community, holding that information back could help protect you from the government or from criminals.
One Final Thought
Doing the things I’ve mentioned in this article are likely to have unintended consequences. That is, they’re likely to make you look suspicious to anyone investigating you.
But then, if you haven’t done anything wrong, it really doesn’t matter how suspicious they think you look. They still have to find evidence, not suspicion, in order to take any action against you.
Your ready answer to this suspicion should be that you are protecting yourself from criminals. Even government agencies recommend taking precautions for that reason, so by stating that, you’re throwing the onus back on them. If they don’t like that, it’s just too bad.
WHAT HAPPENS NEXT? THREE WEEKS UNTIL THE BIGGEST SHIFT IN GLOBAL POWER
The clock is ticking. Trump has given NATO and Ukraine a choice: Sign the peace deal, or lose America forever.
Here’s what to expect:
✅ Europe will beg and plead for Trump to reconsider – but he won’t. They had years to fix this. Now, they’re out of time.
✅ The mainstream media will go into full meltdown mode. They’ll scream about “abandoning allies” and “giving Putin a victory.” But the truth? Trump is securing peace, not war.
✅ Globalists will panic as their war machine collapses. Without America’s endless cash and firepower, NATO’s ability to wage war is finished.
✅ America wins! Finally, no more endless wars draining our economy and resources. We can focus on our own country instead of fighting Europe’s battles.
You can access the entire video right here, or by watching it below!
Source: askaprepper.com by Rich M.
I want to present you one of the most interesting sites, where you will see new articles daily! www.321gold.com
It sounds like something out of a Cold War era movie. Boxes of medical supplies stacked high in government warehouses to help citizens in the event of a public health emergency.
However, this huge stockpile is very real. It is called the Strategic National Stockpile, and “Once Federal and local authorities agree that the SNS is needed, medicines will be delivered to any state in the U.S. in time for them to be effective. Each state has plans to receive and distribute SNS medicine and medical supplies to local communities as quickly as possible.”
For security reasons, the location and the number of warehouses that comprise the SNS are classified information – as is much of what is in them. “If everybody knows exactly what we have, then you know exactly what you can do to us that we can’t fix,” Greg Burel, director of the program told National Public Radio in a recent interview. “And we just don’t want that to happen.”
The SNS started in 1999 with an approximate $50 million budget. Since then, it has built an inventory in multiple warehouses that is valued at just over $7 billion. “If you envision, say, a Super Walmart and stick two of those side by side and take out all the drop ceiling, that’s about the same kind of space that we would occupy in one of these storage locations,” Burel said.
The SNS extensive inventory includes massive amounts of small pox vaccines, antivirals in case of deadly flu pandemic, medicines to treat radiation burns and sickness, chemical agent antidotes, wound care supplies, antibiotics and IV fluids.
NPR science writer Nell Greenfieldboyce recently visited an SNS. She was told she was the first reporter ever to visit the secret warehouses, and she had to sign a confidentiality agreement not to describe the location or the exterior of the facility.
A locked section of the warehouse stocks painkillers than can be addictive. A giant freezer is filled with medicines that need to be kept frozen. Greenfieldboyce described a humming sound that comes from the rows of ventilators that are charged once a month and sent out for maintenance once a year.
With an annual budget of more than half a billion dollars, the SNS is charged with deciding what to purchase for the stockpile. In order to do so, officials must determine which threats are realistic and which are not.
“That’s where we have a huge, complex bureaucracy trying to sort through that,” Irwin Redlener, director of the National Center for Disaster Preparedness at Columbia University, told Greenfieldboyce.
The government recently hired a firm called Gryphon Scientific to analyze how well the stockpile could respond to a range of health disaster scenarios.
Although he said he could not be specific on results of the study, Gryphon Scientific’s Rocco Casagrande told the NPR reporter, “One thing we can say is that across the variety of threats that we examined, the Strategic National Stockpile has the adequate amount of materials in it and by and large the right type of thing.”
However, he pointed out that the studies were based upon a single type of attack at a time or a single type of weapon.
The brief shelf life of some of the newer medicines is a problem for the SNS. “These are often very powerful, very exciting and useful new medicines, but they are also very expensive and they expire after a couple years,” explained Dr. Tara O’Toole, a former Homeland Security official who is now at In-Q-Tel, a nonprofit that helps bring technological innovation to the U. S. intelligence community.
Another problem is the time it would take to get the medicines from the warehouses to the people who need them in the event of real emergency. “It is not going to be easy or simple to put medicines in the hand of everybody who wants it,” O’Toole told NPR.
“While they do have plans for emergencies, and lists of volunteers, they’re volunteers,” said Paul Petersen, director of emergency preparedness for Tennessee. “And they’re not guaranteed to show up in the time of need.”
Local public health officials have had severe budget cuts and are underfunded, Petersen told NPR. “Over and over, I heard worries about this part of the stockpile system.”
O’Toole said, “We have drastically decreased the level of state public health resources in the last decade. We’ve lost 50,000 state and local health officials. That’s a huge hit.” She commented that emergency drills would be helpful, adding, “The notion that this is all going to be top down, that the feds are in charge and the feds will deliver, is wrong.”
Meanwhile, the secret warehouses continue to stockpile supplies. “We have the capability, if something bad happens, that we can intervene in a positive way, but then we don’t ever want to have to do that. So it’s kind of a strange place,” Burel told NPR.
“But we would be foolish not to prepare for those events that we could predict might happen.”
I want to present you one of the most interesting sites, where you will see new articles daily! www.321gold.com
The mantra of Guns, Bullets, and Beans is a reasonably common one but bullets go both ways. Almost everyone who has served in active duty involving gunshot injuries or has been involved in treating them will tell you never to engage in a fire fight unless you have no other choice. Rather than focusing on building a fortress to defend your supplies it is safer to build a home you can walk away from without compromising your supplies or getting on the wrong end of a gunshot wound.
Rule One: Do not get shot.
Rule Two: Get shot in a leg or arm without any bone involvement.
Rule Three: If you have to be in a fire fight make sure you kill them all before they can return fire.
I have never been shot and I have only had two guns pointed at me but I have nursed a fair number of shot ICU patients over the years. In SHTF things will be different and trauma care for shooting patients (I dislike the term ‘victims’ as it implies powerlessness) needs a hard look at especially if you live in an area of the world that has a lot of armed people around you. This article will have some biology (science is fun!) and I am not talking about body armor or types of ammunition (not my specialty but here are penetration estimates. If Pat uses them there will be graphic photos and I hope these will not trigger anyone but knowledge is power.
The article is long and I am not going into lung, abdominal, brain care as basically you are likely dead. Please look up lung injuries as knowing what tension pneumothorax, septic shock, and paralytic ileus are good ideas.
Basic Field Care if you are Shot
Avoid being shot again. Disengage and get to the safe area. All home and bug out locations should have a stocked and safe area away from the main buildings that is believed to be safe in the event of an attack.
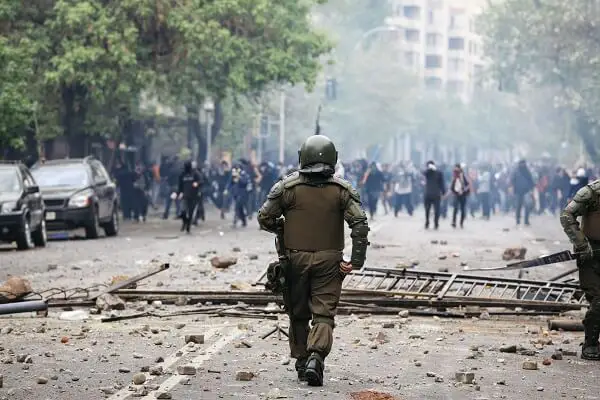
A wounded man is helped to get away from gun shots Picture: AFP
Do not scream “medic!” or “I’m hit!” There is a fire fight going on so do not give tactical information to the enemy or distract your side. Everyone on your team is a field medic and has practiced for this so no one helping you needs to be screaming for help either. You and/or they deal with it until after the fire fight. Stay off the radio until the fire fight is over and give no tactical details if summoning help. “Jimmy I’m at X and I’d like to see you” is better than “Jimmy! They shot me in my leg. It hurts. I need help now”
Look for the entrance area and check if there is an exit area. Survey yourself quickly for other injuries. Entry wounds can look insignificant and exit wounds can look dramatic. The actual issue is what was in the way and what is happening beneath these entry and exit points.
Exit wounds can look dramatic
Cover the wound’s entry and exit points with thick cloth or blood stopper bandage as soon as you can. Limit the blood flow by partial or a full tourniquet if you have knowledge to safely use one. Blood looks dramatic and it is hard to assess the amount. Pulse rising, blood pressure dropping, consciousness failing are signs of massive blood loss. Without intravenous infusions and/or blood transfusions you will likely die. I know some are prepping to give blood transfusions but this is a really dangerous and specialized intervention. Giving a basic intravenous of normal saline (0.9% sodium chloride) is simple and easily learned. Both are illegal to use but not to learn unless you are a medical doctor.
Leave this initial thick pad on no matter how wet it gets. Add more and do not remove any. I do not feel a blood clotter like the Israeli Bandage should be applied at this stage unless you have several in reserve. If you have one only consider using it after the next phase of care or buy more than one. Technology keeps evolving but if you use it can you remove it without an Operating Room?
If possible elevate the wound above your heart. This lowers the blood pressure locally and should decrease bleeding. Realistically it probably will be easier to raise your heart above the wound site.
If bone is injured splint it as it is for transport and apply the initial pad over the splint.
If it is not an abdominal injury drink as much water as you can and keep drinking one pint an hour. Sports mixes are a good idea as well. If abdominal you will likely die but stay nil by mouth (NPO) as you might get lucky and abdominal trauma is always worse if you take anything by mouth.
It is going to get painful quickly so use the brief pain-free period to move away from the bullets and get to safety.
Basic Field Care if you are the Medic
Yeah! We won and all the bad guys and girls are dead. As in all First Aid situations assess the area for possible threats prior to giving care. Any snipers waiting as your team-mate was screaming for help giving away his location? Has the shooter who did the hit been dealt with or are you next? Consider dragging the injured away from the scene before doing anything else.
When safe have a look and verify if they are alive or just barely alive? If dead or barely alive then do not waste time, energy, and supplies.
Reasonable signs of potential viability are that they are conscious and can talk to you in sentences. If they are able to do this has the wound caused abdominal contents to become free?
Sorry but without a surgeon and a good hospital/surgical set up your friend’s dead if you can see bits of their bowels. Brains oozing out of the wound, eyes, nose, or mouth are equally untreatable in SHTF so do not waste supplies on a futile attempt.
Then follow the steps you would take if you had been shot. Starting to go beyond these in the field is just not a good idea. Get them to the safe zone.
Safe Zone Preliminary Care
Everyone in your group should know how to do this as you might have to do it for yourself.
Emergency War Surgery: The Survivalist’s Medical Desk Reference
Unlike every film you have ever seen getting shot is extremely painful and shock is likely for the pain alone even if blood loss is minimal. Get calm and practice deep breathing techniques to slow and steady your breathing and your heart rate. If you have alcohol available do not drink it if you are shot. If you are the medic have a small amount. Seriously, I have a small bottle of brandy in my kit for me to swig if I am facing a major injury and it can also be used to sterilize instruments and your hands.
Okay. Now what are we facing here? If they are unconscious check for other wounds as there are many cases where the obvious and none fatal wound gets all the care while the insignificant and overlooked wound slowly kills the patient.
Strip them naked. Use scissors or a knife but get them fully naked unless they are conscious and are sure they have only one wound. Even so I am stripping them and doing a quick body search. Note where all the wounds are and where you see swelling and bruising. Is this survivable? If there is flank and/or side deep bruising from an abdominal wound likely means the spleen is damaged if on their left side or the liver if on their right side. Frankly they are going to die unless you can do surgical repair which is highly unlikely and is highly skilled. Wounds that go through the body are more survivable than those where the bullet remains inside but a through shot going through the deep abdominal area or chest is likely not one you can treat. No worries they will die quickly from blood loss or lack of oxygen.
If the decision to treat is made then clean the area around the wound and your exposed arms and forearms with something. Clean water if that is all you have or use the remaining brandy to clean your hands carefully. Soap and water is awesome hence having a stocked safe area previously set up for major injuries away from the areas likely to be in a fire fight is a good move. You can use multiple different liquids but the aim is to pour the external stuff AWAY from the wound and never towards it.
Having done that move them onto a fresh laundered sheet or have one placed under them. If possible have the room warm to avoid cold shock but you need the area naked to do this care. Avoid using beds as they are too low and the mattress will be ruined. A massage table or a folding plastic table is a good idea.
Using a powerful flash light (have a head lamp if you cannot get an assistant) pick out and remove everything you can see in the wound that is unattached to the patient. Clothing and bullet and bone fragments have to be removed or infection will occur for sure.
Now reassess blood loss. Is it arterial (bright red maybe but you can see it pulsing) or venous (dark for sure and steady stream)? If arterial use a tourniquet between the wound and the heart if possible, get sterile gloves on, and go in. Find the sight of bleeding and suture it. This can result in limb loss but most arteries can be sealed and blood flow can take alternative routes. At a pinch you can seal it with a hot piece of metal from a fire but frankly you likely will have the patient die of shock. This is not the movies. Still I’d consider it for a wound in a limb that cannot stop bleeding no mater my digging around in there.
Yes you can use back powder but only if it is a limb and the bleeding cannot be stopped. This will hurt and inflict a severe burn on top of the other injuries.
Set bones if you can and have to at this stage. The wound is as clean as you can get it and you have flushed it out with loads of cooled boiled water after adding a bit of salt. 0.9% sodium chloride is normal for the human body but flush it out a lot until most of the bleeding has stopped. You have removed every bit of dirt, clothing, and bullet you can see in there. You have stopped all major bleeding. Doing this on yourself is unrealistic despite the movies so everyone in your group needs to know how to do this not just the doctor or the nurse. They might be the one shot.
Start broad spectrum antibiotics and ensure 3-4 liters so fluid intake a day. Use the intravenous if you have to but keep them hydrated.
Broad Spectrum Antibiotics:
Amoxillin
Levofloxacin
Gatifloxacillin
Streptomycin
Tetracycline
Chloramphenicol
If bone involvement it is very important to use a broad spectrum antibiotic to avoid issues later on with chronic bone infection. If you have antibiotics then use them if the wound penetrated deep into the body. Hopefully their tetanus is up to date especially if soil has entered the wound which in SHTF is likely from clothing in a fire fight. Antibiotics will not help tetanus and it basically kills people horribly.
Ongoing Care
Evacuate them to a hospital with a trained doctor as soon as possible. If you can do this within 60 minutes you dramatically increase their chance of living. Okay if you cannot then try this!
Wound Care
If the outside of the dressing is clean and dry and there is no obvious smell, swelling, or severe pain then leave it on for 7 days. Do not peek! Change the dressing using clean materials if sterile ones are unavailable. Laundered sheets work fairly well for this so have a supply kept aside for health care use. Unopened packs of baby wipes can also be considered very clean. Wash your hands and arms well with soap and water before and after giving all care and especially wound care. You do not need a face mask but do not breathe into the wound even if you are wearing one. The outsides of face masks are extremely contaminated and the human mouth is as well even if you floss frequently. Use cooled boiled salt water to soak and dressing that are stuck and take them off gently.
If the wound is bulging or leaking pus (yellow smelly stuff) then remove one or two sutures and let it be open to drain. Be aware that 7-14 days afterwards this can occur and the entire wound site might burst open. Flush everything with loads of cooled boiled salt water and attempt to push gently back into the body and then suture really well. Probably will die but worth a try if you have got this far. Open it carefully being sterile if possible and remove obviously dead tissue and wash everything out. Have a good look for any debris you missed the first time you treated this. This is a wound infection and needs 12-24 hour dressings until it heals (once or twice a day). Change the antibiotic given if you can at this point. Do not use triple antibiotic cream, honey, or anything inside the body. Just don’t ever no matter the temptation. Flush with cooled boiled water and if open and you need to pack it use cooled boiled water-soaked sterile gauze.
General Care
Use limited bed rest. However sick they are turn them every 1-2 hours in bed and get them up in a chair as soon as possible and totally ignore their complaints about this. Immobility kills. Keep them hydrated well and use higher protein foods if available. Add a stool softener into the mix early on if they are immobile. Metamucil works fine if used early on. Let them rest a lot and avoid strain on the wound area but also make them feel useful. They can cut up clothing for toilet paper and other chores so make them earn their keep.
They will out of commission for a long time so have stored food available and firewood and drinks they can reach even in a weakened state. You might not be able to do this for them.
I want to present you one of the most interesting sites, where you will see new articles daily! www.321gold.com
Our panel of experts answers the age-old question ‘If you could only grab one gun when SHTF, what would it be?’
The question is pretty commonly heard at gun shops, barbecues and shooting ranges. Every shooter knows it, and every shooter thinks about it. What gun would you choose if you could only have one gun? It seems simple, but experts and enthusiasts alike know how difficult it can be.
The question gets a little trickier when we add a caveat: What if it’s during the apocalypse? Now you have to consider ammunition; if you run out of ammo, will you be able to scrounge some up? What about hunting and self-defense?
Answering this question can be difficult, but that’s why we’ve assembled an assortment of industry experts to offer their opinions. On top of learning more about each of these gurus, these answers can also help you formulate your own.
Nick Collier
Affiliation: DoubleStar Corp.
Position: Senior Executive, DoubleStar, Training Academy Instructor
SHTF Gun: AR-15
I’d choose an AR-15 for a SHTF situation. That’s an easy choice. I have had this conversation many times with industry associates as well as family members and friends. With the thousands of variations available, the AR-15 is the best choice. My decision is based on the following: training, reliability, ease of use, size and ammunition.
I have spent ample time training on this firearm. I feel like I would be able to handle the weapon in a variety of situations. Whether I am in a rural setting taking distant shots or a densely populated area, the AR-15 is capable of kill shots in excess of 300 yards, and it’s short enough to maneuver in urban terrain.
The reliability of the AR-15 is only as good as the sum of its parts. When built with quality components, the AR-15 will perform in most any condition, as proven by our military and law enforcement over the years. I adhere to the “buy once, cry once” principal when buying gear. Go ahead and pay for the good stuff and you won’t have to buy it again.
Ease of use is another big factor. Not everyone is a trained firearms enthusiast, so you may encounter situations where you are unable to fire and need to teach someone in your group to return fire or hunt for food. The AR is very basic and easy to use. My 9-year-old son has been shooting one since he was big enough to hold it up, and in my training experience, it doesn’t take much to get the average person up to speed safely.
The size of the AR-15 makes it easy to carry. If you have ever covered a long distance on foot, you know every ounce you are carrying counts. Moving through obstacles also requires a small, compact firearm. Any hunter can tell you that climbing over fallen trees and rough terrain is easier with a smaller, shorter rifle, and the AR-15 can be made short to carry and adjusted for the correct length of pull with collapsible stocks.
The last and maybe biggest factor is ammunition. The AR-15’s standard 5.56mm cartridge is big enough to put down small- to medium-sized targets with well-placed shots. Whether it’s a zombie horde or a whitetail dinner that comes into the scope, the 5.56mm cartridge can handle it. Carrying six to ten 30-round magazines on your plate carrier or in your backpack still leaves room for things like water, food and medical supplies on your trek without adding too much bulk or weight. Other factors include caliber conversions for larger ammunition and parts availability. The AR-15 is the most popular rifle in America, and it should be easy to find ammunition and parts while scavenging. For these reasons, the AR-15 is the ideal SHTF firearm.
Mike Detty
Affiliation: Mad Dawg Global Marketing, Inc.
Position:President
SHTF Gun: AR-15 carbine
Guns are tools, and each of them has been designed to perform a certain job. Unfortunately, an event of apocalyptic proportions can limit our choices, so the selection of just one gun is extremely critical. To me, this means choosing a gun that has a great degree of versatility. My pick would be an AR-15 carbine.
For many years I competed in USPSA competition and considered myself an above- average shooter, and I own many nice, custom 1911 pistols. But I have enough experience behind a carbine to know that no matter how much I practice with my pistol, I will never be able to shoot one as accurately as one of my AR-15 carbines. AR-15s are accurate while the 5.56mm cartridge is light on recoil, making this combination especially effective and easy to shoot for all family members.
Besides the precision of a carbine, there is also the capacity factor. Thirty-round AR magazines are abundantly available at bargain prices. My own home-defense guns all use 40-round Magpul 5.56mm magazines.
Flattop carbines are especially versatile and offer the shooter the ability to use folding backup sights, reflex sights or a scope depending on the task at hand. Free-floating handguards make it easy to attach lights, lasers and other accessories to aid the shooter.
The AR’s modular design also makes it easy to switch uppers—i.e., convert the gun from a short M4-style carbine to a long-range precision rifle with ease. Guns can even be converted to hard-hitting calibers like the .458 SOCOM or inexpensive .22 LR.
The ubiquitous of the AR-15 makes its choice a logical one in a doomsday scenario. Parts, magazines and ammunition should be easier to find with such a popular gun. Unwanted parts or accessories should also make for good trading fodder.
My own choice for home defense is an AR-15 SBR with a 7-inch barrel, a flash suppressor and a red dot reflex sight. In the event of an unimaginable catastrophe where I can only grab one gun before I leave my home, I would feel very well protected with my AR-15!
Mykel Hawke
Affiliation: U.S. Army Special Forces veteran, survival instructor, author, star of the Travel Channel’s “Lost Survivors”
Position: Founder and Director of SpecOps Adventures and Training
SHTF Gun: Scavenger 6 by Ralston Arms
Like any skilled person, I prefer to use the right tool for the task. However, sometimes you have to make do and improvise. As a survival guy, I live with a long machete, large, medium and small knives and a backup. The same principles apply for my weapons; I have sniper rifles, shotguns, AR-15s, pistols. But if I must choose just one weapon, I want the one that will give me the biggest bang for the buck, which means it has the most utility and versatility.
So, for me, the best all-around weapon to carry in a bug-out situation would be the Scavenger 6 by Ralston Arms. Designed by one of the most creative survival inventor/designer guys I’ve ever met, Tim Ralston, it’s a weapon that can shoot 21 different calibers. In a survival situation, you never know what kind of ammo will be available. It’s very likely you’ll sooner or later expend whatever ammo you have stored and you can’t always carry all the ammo with you, but if your weapon will shoot whatever is around, you’re well ahead of the power curve, and in a crisis, that could be the difference between surviving and pushing up daisies.
Jared Hinton
Affiliation: Vista Outdoor
Position: Communications Coordinator for Firearms & Ammunition
SHTF Gun: Savage 11 Hog Hunter
I’m a bolt-action fanatic, and a gunsmith first. Somewhere deep down inside me, I still believe that the autoloading firearm is a passing fad; lever actions, bolts and revolvers are simple mechanical mechanisms that still rise to the top of my list if SHTF. Don’t get me wrong—I play with the AR platform, and I’ve assembled more ARs than I can count. The AR-15 is a great option if you expect a firefight. My primary concern is a simple rifle that anyone can operate and maintain should I become immobilized. Backup iron sights are mandatory. If anything happens to the optic, I can’t be stuck guessing where I am shooting. I need to be able to harvest game while having the ability to stop two-legged varmints. No excess hanging off the gun, waiting to get caught on brush while moving. Simplicity.
I value the ability to make one shot matter, and believe the Savage 11 Hog Hunter rifle in .223 Remington would be tough to beat if things got bad in a hurry. The Model 11 Hog Hunter comes in at 7.25 pounds, so it’s no flyweight, but I’ll take the extra weight of the medium-contour barrel for better off-hand control on target. Pre-threaded for a suppressor, the medium-contour barrel won’t submit to point-of-impact shifts that a sporter-weight barrel will with a suppressor out front. I’d top the rifle with a Weaver Classic 1-3x24mm optic in Weaver rings. Light, simple, reliable and the adjustable LPA sights ensure I can hit what I’m aiming at no matter the situation. With an optic, I can keep the entire package under 10 pounds, which is a reasonable threshold for days on the move.
Moving parts and reciprocating mass are more likely to wear, raising concerns over long-term maintenance. Autoloaders have a tendency to make a person waste ammo with extra trigger pulls. The Hog Hunter is compact, made to be hauled through the stuff no one wants to move through, precisely where I’ll be lurking. The Savage action is extremely strong, and should I come across ammo that is questionable, I know that the chances of the action failing are all but nonexistent. The zero-headspace system of the Savage barrel nut and floating bolt head give me a 100-percent reliable lockup that guarantees maximum accuracy and safety.
By choosing the .223 Remington as my caliber, I can carry a high volume of ammo. I need to pack as much ammo on my person as possible. While we’re at it, make it 69-grain Federal Gold Medal rounds; I need to know I’m hitting exactly where I’m aiming. Federal’s Gold Medal Match ammunition is sufficient to engage targets out to 600 yards while I make evasive maneuvers. It also doesn’t hurt that I have a large stockpile of it cached at the farm. It’s not designed for expansion, so it doesn’t excessively damage rabbits, pheasants and vermin that I may need to eat. I also have a decent supply of Fusion ammo stashed around; the 62-grain bonded bullet is more than sufficient for the biggest Minnesota deer I’ll encounter.
If SHTF, my goal is to avoid a close-range confrontation. I don’t need to eliminate most threats—I just need to slow them down long enough for me to get out of the area. Being discreet is my go-to plan, and getting to and holding our farm ground would be my top priority. The Model 11 Hog Hunter is versatile enough that I could trust my life with it when the going gets tough.
Jason Morton
Affiliation: CZ-USA
Position: Vice President of Marketing
SHTF Gun: CZ Scorpion EVO
If SHTF, I can assume that I’m not expecting a typical self-defense scenario, which our daily-carry pocket dump anticipates in these pre-apocalypse times. Instead I have to assume that we can expect multiple encounters with multiple targets. Since my first choice, air support, isn’t an option, I’m reduced to choosing only one gun.
Whatever I choose has to accomplish three goals: have adequate stopping power against multiple targets, be easy to carry with lots of ammo and, given the likelihood of a target rich environment, be common enough in caliber to have a reasonable expectation of finding more ammo when necessary. The multiple-target expectation means that for me, I need semi-auto capability. It also needs to be maneuverable both indoors and out. I think an SBR is just the ticket here. Assuming there is no government at this point, an SBR won’t require a tax stamp—just a hacksaw.
Caliber-wise, I like the .22 LR because I can carry lots of ammunition with me. Unfortunately, I have to find that ammo first and haven’t had very good luck doing that for several years. I know bunches of people are hoarding it in their basements, but if I try to scavenge it from there, I’m very likely to become one of their targets. Let’s say that the .22 LR won’t work due to ammo availability, and we don’t even need to consider stopping power for this one. The 5.56mm and 9mm calibers are going to be the most commonly encountered rounds. They are close enough to the same overall bullet weight that we can call choosing one over the other a draw. For stopping power though, the 5.56mm NATO has to get the nod, assuming I can come up with something other than FMJs, but that’s not a guarantee.
The 5.56mm gives me more range over the 9mm, but I’m more concerned with multiple close targets, so a 9mm carbine or submachine gun is probably going to be my go-to gun in this scenario. It’s got plenty of magazine capacity, good stopping power with the defensive loads most commonly found in the caliber, and it generates low recoil. The 9mm is lighter in weight than a 5.56mm carbine and with a folding stock, and it’s easily concealed. Some might accuse me of being a little biased here, but my top pick has to be the CZ Scorpion EVO for my SHTF gear bag. The Scorpion is fast and reliable. Add a red dot and a suppressor and it’s even better.
Sean Murphy
Affiliation: Nightforce Optics
Position: Marketing Communications Manager
SHTF Gun: DEVGRU “RECCE” carbine
In the event of a true SHTF situation, we must accept that our “normal” day isn’t so normal. If I am limited to taking just one firearm to help me solve problems in a SHTF environment, it’s going to be a rifle.
In my eyes, it is hard to beat the all-around qualities of a good AR-15 carbine. My personal favorite for “the one” is a modern interpretation of the DEVGRU “RECCE” carbine. This upgraded AR-15 has a medium-contour, 16-inch, stainless steel, match barrel; a slim, 15-inch handguard; a muzzle device to accept a suppressor; a collapsible buttstock; and a match trigger. When paired with a good optic/ammo combination, you now have a very effective platform to deliver rounds accurately on target at any practical distance.
Topping off the carbine would be a Nightforce 2.5-10X riflescope, attached in a Nightforce Ultralite Unimount. This piece of glass is a perfect all-around optic that enables close/fast firing at low power, and up to 10X power for target indentification and shooting at longer-range targets. Quality ammo with heavy 69- to 77-grain projectiles or a premium- bonded bullet would be fed through the rifle for the best balance of accuracy and maximum terminal effect downrange.
The moderate weight and overall handiness of this package makes it easy for such a combination to accompany me on many trips hunting for deer, ridding fields of prairie dogs, competing in field/action rifle matches and countless trips to the range. The carbine is not too heavy to carry in hand or on a sling and is a good size to stash in a vehicle. I can deliver precision fire out to 600 yards with reliability (and a little farther on good days), but also engage targets at CQB ranges with ease. Other qualities to like about this setup are the plethora of magazines available, light recoil, ease of operation and perhaps most importantly, reliable operation. As higher-level maintenance or repairs became necessary; the parts availability and limited tools required make it an easy task for a competent person to handle.
Additionally, lights, lasers, bipods, night-vision devices and a whole range of other accessories can be added or removed to suit a particular use or environment. Chambered in 5.56mm NATO, this setup can also accommodate nearly any .223/5.56mm ammo one had stashed or had to scrounge.
If things go seriously wrong in my part of the world, my anticipated threat levels are going to go up, and my armament levels will go up to match. While a handgun provides an easy solution to carry all day, the energy on target, effective range, ammunition capacity and modularity of an AR-15 rifle cannot be ignored. My preference for an “accurized” carbine provides a balanced set of features for nearly any use, from hunting to defense or even limited offense if needed. I like having options to deal with problems, and my “RECCE” gun would be the one to grab.
Robin Sharpless
Affiliation: Redding Reloading
Position: Executive Vice President
SHTF Gun: Marlin 1894C
This is a very fun question to answer. It gives insight into both professional and personal preferences. Many will look at personal interest and or a favorite cartridge. Others will think about the sexiest gun to have during this time. For me, I’ll be driven by practicality.
As an avid handloader, my decision will be driven by something that is effective on wild game for food and predators, be they two- or four-legged. But it also must conducive to being handloaded and offer real versatility. Therefore, my choice is a .357 Magnum lever-action rifle, the Marlin 1894C. With its 18-inch barrel, it can generate enough energy to kill a deer, disable an attacker and handle coyotes but is also compact and convenient enough for easy carrying. Mine would sport a peep sight that works very well for my eyes, and the rifle’s overall handling characteristics make it a good choice for instinctive or point shooting when necessary.
From the reloading front, the choice of the .357 Magnum allows for the use of a variety of powders and, most importantly, the ability to simply and easily cast bullets for future use. Hopefully I’ll have a large stock of good projectiles on hand, but if that’s not the case, this caliber is a simple one to cast bullets for, regardless of what that dark future may hold.
Since the .357 Magnum has a straight-walled case, I won’t need to have lube for sizing. It is extremely easy to load for, and long case life is a positive. Additionally, in a future where we may have to scrounge for components. With that in mind, .357 Magnum and .38 Special brass is going to be relatively easy to find. Through creative loading we can create a range of offerings from quiet, low-velocity, low-flash defense loads to heavy-bullet loads capable of taking deer-sized North American game for food. While I would not tackle a grizzly bear, I would have confidence with this rifle on a black bear, which, by the way, could produce lube for my cast bullets if needed, with a heavy bullet and slower powder.
Bill Wilson
Affiliation: Wilson Combat
Position: President and Founder
SHTF Gun: Wilson Combat Tactical Lightweight .308 (rural), Wilson Combat AR9B(urban)
I think there are two different answers to this question based on where I am geographically. If I’m living on my ranch in rural Texas when SHTF and I can only have one firearm for the foreseeable future, my pick would be a lightweight .308 Winchester AR with a 14.7-inch barrel. I’d hopefully also have two additional upper receivers—in 6.5 Creedmoor and .338 Federal—with 18-inch, crowned-muzzle barrels for longer-range defense and more killing power for hunting. I’d really feel pretty naked without a handgun on my side since I carry one 24/7, but the question was one gun, and a .308 Winchester AR would handle most any defensive situation I would likely encounter in rural Texas and still put meat on the table as needed. Also .308 ammunition is pretty common in this neck of the woods—not that I don’t always have plenty on hand!
My setup would be as follows: I’d choose a Wilson Combat Tactical Lightweight .308 with a 14.7-inch barrel and a permanently attached Q-Comp flash suppressor. I’d add a top-quality optic like a Leupold 2-12x42mm VX-6 riflescope as well as a Streamlight TLR-1 HL weapon light and a sturdy Blue Force Gear Vickers two-point sling.
If allowed, my extra 6.5 Creedmoor upper would have a mid-weight, 18-inch, crowned-muzzle barrel and a Leupold 2-12x42mm VX-6 scope. The .338 Federal upper would have a light “Hunter” 18-inch, crowned-muzzle barrel and the same scope.
If I am in a large city on business (I would never live in a city!) when SHTF and I can only have one firearm for the foreseeable future, my answer changes. For this one I’m assuming total society breakdown and chaos in the city. For that, the need for concealed carry is a thing of the past. That being said, I’d go with one of our new AR9B 9mm carbines that uses Beretta 92/M9 magazines, which I normally take with me when I travel. In a true SHTF situation in an urban area, I want to be prepared for multiple assailants at relatively short ranges.
A light and short carbine that is easy to carry and deploy in tight places would be very handy. A 9mm carbine would also allow me to carry a lot of ammunition, and using subsonic loads, it would be almost as quiet as a suppressed 5.56mm. An additional plus would be the very likely chance that eventually I would be able to acquire a 9mm pistol, and ammunition compatibility would be a good thing.
For this setup I’d choose a Wilson Combat AR9B with a fluted, 14.7-inch barrel and a permanently attached Q-Comp flash suppressor. I’d use a Leupold 1-6x24mm VX-6 scope and an Aimpoint CompM4s, both in QD mounts, as well as a Streamlight TLR-1 HL weapon light and a Blue Force Gear Vickers two-point sling.
A good stockpile of food will go a long way toward helping you survive the aftermath of any disaster or life crisis, especially when grocery stores are emptied.
In fact, I’d go so far as to say that there are people who are not preppers who nevertheless instinctively know to stockpile food. This really isn’t surprising when you consider that through most of mankind’s history, stockpiling food was essential to survival — specifically surviving the winter months. During those months, wildlife is bedded down trying to stay warm and plants are dormant. If one didn’t have a good stockpile of food, their chances of survival were pretty darn slim.
But knowing to stockpile food and knowing what to stockpile are two different things. The vast majority of what the average American family eats is unsuitable for stockpiling, because it falls into one of three categories:
Junk food – Lots of carbs, lots of sugar, lots of salt and lots of chemicals, but not much nutrition.
Fresh food – Foods that won’t keep without refrigeration.
Frozen food – It will begin to spoil within two days of losing electrical power.
So we need to come up with other foods — foods that will give us a lot of nutrition and also have the ability to be stored for a prolonged period of time. Here are what we consider the 19 most important ones:
1. Beans – This is one of the more common survival foods. Not only are beans plentiful and cheap, but they provide a lot of protein — something that’s hard to find without meat.
2. White rice – The perfect companion to beans. An excellent source of carbohydrates, and it stores well. [Note: Don’t store brown rice, which contains oils and will spoil.]
3. Canned vegetables – A good way of adding micro-nutrients to your survival diet. Canned goods keep well, long past the expiration date on the label.
4. Canned fruit – For something sweet, adding canned fruit allows you a nice change of diet. Being canned, they keep as well as the vegetables do.
5. Canned meats – Of all the ways of preserving meat, canning is the most secure in protecting the meat from decomposition. While it doesn’t typically have as good a flavor as fresh meat, it still provides animal protein at the most reasonable price you’ll find.
6. Honey – As long as you can keep the ants out of it, honey keeps forever. Plus, it is beneficial during cold season.
7. Salt – Nature’s preservative. Most means of preserving foods require the use of salt. In addition, our bodies need to consume salt for survival.
8. Pasta products – Pasta is a great source of carbohydrates, allowing you a lot of variety in your cooing. Besides that, it’s a great comfort food for kids. Who doesn’t like spaghetti?
9. Spaghetti sauce – Obviously, you need this to go with the pasta. But it is also great for hiding the flavor of things your family doesn’t like to eat. Pretty much anything, with spaghetti sauce on it, tastes like Italian food — whether you’re talking about some sort of unusual vegetable or a raccoon that you caught pilfering from your garden.
10. Jerky – While expensive to buy, jerky is pure meat, with only the addition of spices. Its high salt content allows it to store well, making it a great survival food. It can be reconstituted by adding it to soups and allowing it to cook.
11. Peanut butter – Another great source of protein and another great comfort food, especially for the kiddies. It might be a good idea to stockpile some jelly to go with it.
12. Wheat flour – For baking, especially baking bread. Bread is an important source of carbohydrates for most Americans. Flour also allows you to shake up the diet with the occasional batch of cookies or a cake.
13. Baking powder & baking soda – Also for making the bread, cookies or cakes.
14. Bouillon – Otherwise known as “soup starter,” this allows you to make the broth without having to boil bones on the stove for hours. Soups will probably be an important part of anyone’s diet in a survival situation, as they allow you to eat almost anything. Just throw it together in a pot and you’ve got soup.
15. Water – We don’t want to forget to stockpile a good supply of water. You’ll go through much more than you expect. Experts recommend a minimum of one gallon per person per day, but remember: That’s just for drinking.
16.Whole-wheat –Crackers are a good replacement for bread and make a fine substitute when making sandwiches. Due to their higher fat content, whole-wheat or whole-grain crackers have a shorter shelf life than their plain counterparts (check the box for expiration dates), but the extra fiber pays off when you’re particularly hungry. Consider vacuum-packing your crackers to prolong their freshness.
17. Nuts and trail mixes – Stock up on these high-energy foods—they’re healthful and convenient for snacking. Look for vacuum-packed containers, which prevent the nuts from oxidizing and losing their freshness.
18. Powdered milk –Almost all dairy products require refrigeration, so stock this substitute for an excellent source of calcium and vitamin D when fresh milk isn’t an option.
19.Multivitamins –Supplements will help replace the nutrients you would have consumed on a normal diet.
While this doesn’t constitute a complete list of every type of food that you should stockpile, it’s a good starting point. You’ll want more variety than this, but in reality, your family can survive for quite a while with just the 15 things on this list.
As your stockpile grows, add variety to it. One way of doing that is to create a three-week menu, with the idea of repeating that menu over and over. If you have everything you need to cook everything on that menu, you’ll have a fair assortment of food, and enough so that your family shouldn’t grow tired of it.
A good stockpile of food will go a long way toward helping you survive the aftermath of any disaster or life crisis, especially when grocery stores are emptied.
In fact, I’d go so far as to say that there are people who are not preppers who nevertheless instinctively know to stockpile food. This really isn’t surprising when you consider that through most of mankind’s history, stockpiling food was essential to survival — specifically surviving the winter months. During those months, wildlife is bedded down trying to stay warm and plants are dormant. If one didn’t have a good stockpile of food, their chances of survival were pretty darn slim.
Preparedness Hacks: Once a nuke is heading your way, you might think that there isn’t much left to do, but you would be wrong!
But knowing to stockpile food and knowing what to stockpile are two different things. The vast majority of what the average American family eats is unsuitable for stockpiling, because it falls into one of three categories:
Junk food – Lots of carbs, lots of sugar, lots of salt and lots of chemicals, but not much nutrition.
Fresh food – Foods that won’t keep without refrigeration.
Frozen food – It will begin to spoil within two days of losing electrical power.
So we need to come up with other foods — foods that will give us a lot of nutrition and also have the ability to be stored for a prolonged period of time. Here are what we consider the 19 most important ones:
1. Beans – This is one of the more common survival foods. Not only are beans plentiful and cheap, but they provide a lot of protein — something that’s hard to find without meat.
2. White rice – The perfect companion to beans. An excellent source of carbohydrates, and it stores well. [Note: Don’t store brown rice, which contains oils and will spoil.]
3. Canned vegetables – A good way of adding micro-nutrients to your survival diet. Canned goods keep well, long past the expiration date on the label.
4. Canned fruit – For something sweet, adding canned fruit allows you a nice change of diet. Being canned, they keep as well as the vegetables do.
5. Canned meats – Of all the ways of preserving meat, canning is the most secure in protecting the meat from decomposition. While it doesn’t typically have as good a flavor as fresh meat, it still provides animal protein at the most reasonable price you’ll find.
6. Honey – As long as you can keep the ants out of it, honey keeps forever. Plus, it is beneficial during cold season.
7. Salt – Nature’s preservative. Most means of preserving foods require the use of salt. In addition, our bodies need to consume salt for survival.
8. Pasta products – Pasta is a great source of carbohydrates, allowing you a lot of variety in your cooing. Besides that, it’s a great comfort food for kids. Who doesn’t like spaghetti?
9. Spaghetti sauce – Obviously, you need this to go with the pasta. But it is also great for hiding the flavor of things your family doesn’t like to eat. Pretty much anything, with spaghetti sauce on it, tastes like Italian food — whether you’re talking about some sort of unusual vegetable or a raccoon that you caught pilfering from your garden.
10. Jerky – While expensive to buy, jerky is pure meat, with only the addition of spices. Its high salt content allows it to store well, making it a great survival food. It can be reconstituted by adding it to soups and allowing it to cook.
11. Peanut butter – Another great source of protein and another great comfort food, especially for the kiddies. It might be a good idea to stockpile some jelly to go with it.
12. Wheat flour – For baking, especially baking bread. Bread is an important source of carbohydrates for most Americans. Flour also allows you to shake up the diet with the occasional batch of cookies or a cake.
13. Baking powder & baking soda – Also for making the bread, cookies or cakes.
14. Bouillon – Otherwise known as “soup starter,” this allows you to make the broth without having to boil bones on the stove for hours. Soups will probably be an important part of anyone’s diet in a survival situation, as they allow you to eat almost anything. Just throw it together in a pot and you’ve got soup.
15. Water – We don’t want to forget to stockpile a good supply of water. You’ll go through much more than you expect. Experts recommend a minimum of one gallon per person per day, but remember: That’s just for drinking.
16.Whole-wheat –Crackers are a good replacement for bread and make a fine substitute when making sandwiches. Due to their higher fat content, whole-wheat or whole-grain crackers have a shorter shelf life than their plain counterparts (check the box for expiration dates), but the extra fiber pays off when you’re particularly hungry. Consider vacuum-packing your crackers to prolong their freshness.
17. Nuts and trail mixes – Stock up on these high-energy foods—they’re healthful and convenient for snacking. Look for vacuum-packed containers, which prevent the nuts from oxidizing and losing their freshness.
18. Powdered milk –Almost all dairy products require refrigeration, so stock this substitute for an excellent source of calcium and vitamin D when fresh milk isn’t an option.
19.Multivitamins –Supplements will help replace the nutrients you would have consumed on a normal diet.
While this doesn’t constitute a complete list of every type of food that you should stockpile, it’s a good starting point. You’ll want more variety than this, but in reality, your family can survive for quite a while with just the 15 things on this list.
As your stockpile grows, add variety to it. One way of doing that is to create a three-week menu, with the idea of repeating that menu over and over. If you have everything you need to cook everything on that menu, you’ll have a fair assortment of food, and enough so that your family shouldn’t grow tired of it.
During a SHTF situation, pain could become an annoyance for some, but unbearable for others.
If doctors are scarce and medicine becomes even scarcer, this one little weed, found all over North America and similar to morphine, could be a saving grace.
Dealing with this subject has been quite difficult for me. Both the concept of the state stripping you of everything and the SHTF concept have as many backgrounds as diverse interpretations, so trying to approach this from a single point of view is a complicated task.
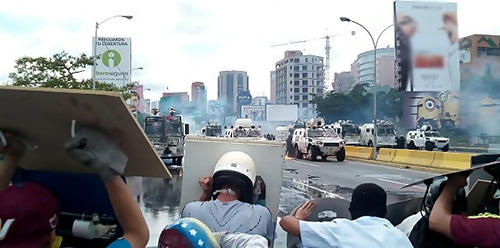
In my country, Venezuela, after 20 years of “revolution,” we have bottomed out and learned to live in situations we never imagined (so much so that I was able to write an article on survival techniques I never imagined myself using on daily basis).
It’s not that the governments before Hugo Chavez were much better. But there was a much more stable political and economic situation with access to the international market.In 1999, when Chávez’s government was instated, oil prices were the highest in Venezuela’s history. The newly born Communist policy in the country was hardly felt and had very few repercussions on the professional citizens who lived on a monthly salary.
During a SHTF situation, pain could become an annoyance for some, but unbearable for others.
If doctors are scarce and medicine becomes even scarcer, this one little weed, found all over North America and similar to morphine, could be a saving grace.
That’s probably why those first few years didn’t really feel like something was taken away from us. In addition, the newly elected president had a 60% popular approval rating and promised endless opportunities for the neediest people.
One of the first economic policies was the implementation of exchange control, currently in effect. Any operation with foreign currency was managed by the state. Later came the control of the prices of basic products, which caused the disappearance of those items and initiated a black market that is also very much in force to this day.The real problem began in 2004 with the accelerated decrease in oil prices that translated into a lower income for the government. Remember that we are talking about an oil-reliant country.
The decay was soon seen in many aspects. There was no longer maintenance on public roads, and public services failed often until reaching the point of constant failures of electric service, even for days.
The public health situation is also getting worse and worse. As a health professional, I have seen this deterioration for the last 10 years.
I am an oncologic breast surgeon. In Venezuela, breast cancer is the main cause of death from cancer in women. However, in the hospital where I work, the most important hospital in Caracas, there are no basic services for this issue. No chemotherapy, the radiotherapy equipment has been inoperative since 2015, and surgical procedures are suspended every week.
For me, as a doctor, it is frustrating not to be able to help my patients in any way. Just last week two breast cancer patients who were going to the operating room were suspended for the fourth time in a row. This time the anesthesia machine was failing.
The purchasing power of the Venezuelan citizen also decreased. It seemed to have happened from one day to the next, but if you look at the political situation since 1988, the decline took a long time; all that was left was to hit rock bottom.
Finding ourselves in extreme situations makes our defense system act in a primitive way. This means activating the fight or flight response at any time within any context—and yes, the state takes advantage of that.
The state will rip you off, but it doesn’t happen all of a sudden. There are a lot of logistics; it takes a long time to develop the kind of policy that makes citizens totally dependent on the state.
You start by losing something unimportant, like some kind of monetary bonus now given to you as government-run grocery store credits, and you end up losing your freedom and all kinds of rights, including freedom of speech and protest, but these issues are so extensive that they require an article of their own to explain them properly.
The state has taken charge, with great success I must say, and you are now living in fear of the so-called public authorities, meaning police and military police, since they serve as pro-government forces of repression.
Many of us have lost the incentive to go out and protest. We did it for more than 10 years. However, I have seen the evolution of the manifestations before and now.
I remember 2003 when repression was minimal, almost non-existent. Today many friends who still have the strength to continue have gotten gas masks in order to defend themselves from the hundreds of tear gas grenades used by the authorities that should be defending people.
In any public protest, savage repression is a constant. That violence is what we Venezuelans have become used to.When there is no public or social security, when the devaluation of the currency is occurring on a daily basis, and when you don’t know if the bakery on the corner is going to be broken into tomorrow, at that moment, the debacle has already occurred.
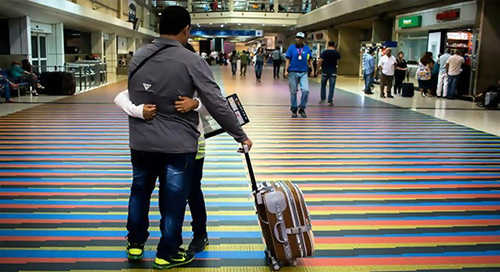
Defending oneself from these kinds of problems is as difficult as trying to explain them. Many have chosen to leave and seek a future in other countries. That way the state even strips you of your own country by causing you to become self-exiled.
I don’t blame them. We all have more than one family member or close friend who has been kidnapped or stolen from violently, and sadly, all we can say is “You should be thankful you weren’t killed”.
Personal security becomes a problem of epic proportions, to the extent that going out on the street is considered a risky activity—a risk to which, unfortunately, you have to get used to in order to live a normal life.Living in that state of continuous stress in which your rights are violated, in cities where, despite paying high taxes, everything seems to be in ruins, is part of that hopelessness that the state achieves in the individual.
Living in a place where a good monthly salary fora top executive, for example, does not reach $100 a month, is not easy, especially taking into consideration that a basic shopping list for a family of four can cost up to $140 monthly.
So the mismanagement of incompetent and corrupt civil servants results in the deep separation of three social classes: extreme poverty, which represents more than 80% of the population and is totally dependent on the government; the working middle class, which manages to subsist through one or two basic incomes plus the economic help of family members abroad; and those who do business with the government and can live in a very comfortable, ideal world that has nothing to do with reality.
Of course, there are exceptions to this, and some people have high incomes without being involved in dubious businesses.
It is sad to see how fourth-level professionals, trained in the country, must leave in order to provide for their families.
I know it is not a unique situation in the world—it has happened and will continue to happen—but it is very different to read about it than to see it sitting in the front row or even being the leading character.
Nowadays it is the common denominator, and more and more qualified professionals and technicians step into the international airport in search of a better quality of life.That’s why there is a whole generation that has no kind of roots in their country and only waits for the opportunity to leave.
I think the worst part of all this is the desolation sown in all of us. It seems to be an endless story, with the political disqualification of opposition leaders, political prisoners, and many more vexations.
Writing all this is not easy, but it makes me reflect. It is an exercise in introspection. Without a doubt, the state strips you of everything in its eagerness to stay in charge. That’s the way they do it.
There comes a point at which the only thing in your mind is to know if you will return home alive. Everything else is secondary. At that point, the state has already massacred you internally. You can never be the same again. I’m sure I am not.
Even if you are a person who is not involved in politics, an “apolitical” citizen, in this state of anarchy, you have to fix your position.
As Desmond Tutu said, “If you are neutral in situations of injustice, you have chosen the side of the oppressor.”
Preparedness Hacks: Once a nuke is heading your way, you might think that there isn’t much left to do, but you would be wrong!
You may have already read or seen a variety of articles about what would happen if the grid went down or how 90% of people would die. You may also think that many of those articles are far-fetched and designed to instill fear in readers rather than seriously discuss the issue.
If that’s the case for you, then you may think the same about this article based on the title alone. But the purpose of this article is not to scare you or to spread so-called ‘doom and gloom,’ but rather to educate you on what very well could happen if the grid really went down and stayed down.
If and when the grid goes down, it’s not going to be like a normal power outage. Not even close. A true grid-down situation would last much longer, perhaps weeks or months, and during that time, a lot of things are going to happen that you never would have imagined.
Here are ten scary things that would happen if the grid went down. Hopefully, this will remind you of how fragile our society actually is and inspire you to start preparing if you haven’t already.
1. No More Supply Trucks
When the supply trucks stop, no stores and restaurants are going to get resupplied. It’s not that it matters much anyway, because those stores are going to be looted and then abandoned afterward anyway.
This will guarantee that within a few short hours of the grid going down, life will already change dramatically because you will no longer be able to resupply yourself with the things that you need. Suddenly, you’ll be wondering why you hadn’t stocked up like you knew you should have been doing all along.
If you haven’t already, consider reading our beginner’s guide to emergency food storage.
2. All The Stores Would Close
As was just mentioned, without the resupply trucks, stores and restaurants are most certainly going to be shut down. The only real question is, when will looting occur?
In some places, you can fully expect looting and rioting to occur within just a few hours of the grid going down, and perhaps even sooner than that. People are going to freak out, and everyone will recognize that it may be their last chance to get resupplied.
Once some people start looting, many more will join in just for the heck of it, and that’s not an exaggeration. Mobs and looters and raiding parties will form quickly and the general breakdown of society around you will be rapid. One moment things will be as they always were, and in the next everything will be a war zone.
If this happens, you’ll need to avoid the riots and get home fast.
3. Schools Would Be Shut Down
Schools will be shut down, even though you can also guarantee they will hold onto any students in session during the early stages of the grid down situation. It’s incredibly unlikely that school administrators and educators will simply release children into the chaos, making it the responsibility of the parents to show up and retrieve their kids in schools.
4. Commerce Would Cease
This is one that you’re going to want to think about. A grid down situation is seriously going to lead to a complete and utter breakdown of commerce as we know it. Banks will no longer be open, ATM’s won’t work, and debit and credit cards will no longer be of any use.
Will you still be able to use cash? Possibly. At the very least, you’ll be able to use it in the early hours of the disaster before things get really bad. You can head on down to your local store and buy as much stuff as you can get if you know things are about to head south.
Beyond that though, it’s difficult seeing cash being of much use for anything. The reason is simple: it has no value other than what people attach to it, and it’s not something we can use to stay alive. In the event of hyperinflation, where the individual dollar will lose value rapidly, it will be of literally no use at all other than as an alternative to Kleenex or toilet paper.
The only type of real commerce that will be going on after then will be bartering, or where people exchange certain goods that we need to survive for other goods. For example, you may be able to trade a box of ammo for several rolls of toilet paper (both of those things are going to be in very high demand following a major disaster).
5. Gasoline Would Be Gone
This is a big one. Gasoline is going to become one of the most precious commodities once people are unable to get any more of it at gas stations.
Everything from cars to motorcycles to ATVs to generators all run on gasoline. We’ve all seen post-apocalyptic movies and TV shows where literally thousands of cars are lying uselessly abandoned by the side of the road. Well, that really won’t be all too far from reality.
In short, once the gasoline supply runs out, we’ll lose everything that runs on gasoline. The only gasoline we’ll have left is what you have stored and what you will be able to barter from other people (and you can guarantee that it’s going to command a very high price).
6. Cell Service Would Stop
Your phone may still work after a grid down, but it’s honestly not going to do you much good if you aren’t able to use it to access cell service or the internet.
It’s one reason why investing in other communication devices will be so important, such as a HAM radio or a CB radio.
Once the Internet and cell service goes down, communication, as we know it in general, is going to get very different (and not at all easier).
7. Post Offices Would Close
You can say goodbye to ordering products from Amazon or sending or receiving mail from people when the grid goes down. This will greatly impact the way that we communicate with people long distance as well.
8. Air Conditioning Won’t Work
Is a lack of air conditioning life-threatening by any means? It depends. In the middle of summer, it very well could be if you don’t take steps to keep yourself cool without AC. At the very least it will be very uncomfortable. And it’s not just air conditioning you won’t have anymore…
9. Heaters Wouldn’t Work
Just as the summer months are going to get really uncomfortable due to the lack of air conditioning, so will the freezing cold winter months due to the lack of heat.
In fact, the lack of heat is going to be a far worse problem than the lack of air conditioning and really could be life-threatening if it ever gets particularly cold outside.
This is why you’re going to want to stock up on as much firewood, propane bottles for heaters, and candles as you can. The firewood will be good if you have a firewood stove inside your home, but even if you lack the stove, you can still use it for getting a small and controllable fire outside.
Meanwhile, propane-run heaters will also be good to stock up on and cost less than five dollars each on average, and you can even use candles for warmth and light as well. Finally, be sure to invest in plenty of warm blankets and sleeping bags to go with it.
10. No More Running Water
This is another big one. You won’t be able to run the dishwasher or the washing machine anymore, nor would you be able to take a shower, run the bath, water your plants, or even fill up a sink.
This is why when you stockpile water, you need to stockpile both drinking and cleaning/personal hygiene water. The recommended amount will be at least one gallon of water per person per day. One half of that gallon will be for drinking, and the other half will be for cleaning and personal hygiene.
Water filters and purification tablets will also be immensely important because when you do manage to procure more water for drinking purposes from other sources, it may not be safe to drink. Drinking unsafe water can oftentimes be more unsafe than not drinking any water at all, which will make a water filter device even more important and critical to own.
There are plenty of threats that people associate with a major disaster. Infection, however, is rarely one of the first threats to come to mind. Nevertheless, it is one of the most dangerous. In the absence of modern medicine and modern conveniences, deadly infections will run rampant, potentially killing millions of people.
Below is a list of the most common deadly infections you are likely to contend with after the SHTF, as well as how to treat them. If you are squeamish, then be warned that the lists of symptoms below could put some disgusting images in your head, but this information is very important considering how many people are likely to die from infections in an SHTF scenario.
Dysentery is a colon infection that can be caused by a number of things including bacteria, parasites, viruses, and even protozoa.
Symptoms of dysentery include severe diarrhea, bloody stool, abdominal pain, and fever. The infection is spread mostly through the consumption of contaminated food or water, though it can also be spread by coming into contact with someone who has the infection.
If you come down with dysentery, your first and foremost goal should be to stay hydrated. Diarrhea alone kills countless people each year because of the dehydration it causes, meaning it’s essential that you drink plenty of fluids, not only to flush out the infection but also to avoid dehydration.
You’ll also want to take antibiotics and/or diarrhea pills if you have them. To prevent coming down with dysentery, be sure to boil your drinking water and only eat food from trusted sources.
2. Cholera
Like dysentery, cholera is a gastral infection that is contracted by drinking contaminated water. Rather than infecting the colon, though, cholera is an infection of the small intestine.
The symptoms of cholera include severe diarrhea that is clear/white in color and vomiting clear fluid. As with dysentery, the biggest threat of cholera is the dehydration and electrolyte imbalance caused by fluid loss through vomiting and diarrhea. If left untreated, about half of individuals who come down with cholera will die from the infection.
If you are experiencing the symptoms of cholera, be sure to stay hydrated and take antibiotics and diarrhea pills. To avoid cholera, boil or otherwise purify all the water you drink and only eat from food sources that you trust.
3. Norovirus
Norovirus is a highly contagious gastral infection that can be spread through the air as well as through the consumption of contaminated food and water.
Symptoms of norovirus include nausea, vomiting, watery diarrhea, and abdominal pain. There is no vaccine or proven treatment for norovirus, and the recommended treatment is simply supportive care such as resting and drinking plenty of fluids.
To avoid norovirus, be sure to purify your water and eat only trusted food sources, though given how contagious this infection is, it can be difficult to avoid even if these measures are taken.
4. Pneumonia
Pneumonia is a respiratory infection that can be brought on by a number of bacteria, viruses, and fungi. In most cases, the diseases that could lead to pneumonia are treated and eliminated before pneumonia ever has a chance to take hold. If left untreated, though, non-fatal colds and cases of flu can quickly turn into fatal pneumonia.
Symptoms of pneumonia include sharp chest pain, wheezing, difficulty breathing, fever, and chills. If the lungs fill up with too much fluid due to pneumonia, the infection could be fatal.
If you come down with pneumonia, it is best treated with a combination of antibiotics as well as oxygen in order to make up for the reduced amount of air you are able to inhale. The best treatment for pneumonia, however, is prevention.
Treat every cold and flu seriously no matter how minor it may seem and do your best to knock it out before it is able to transition into a case of pneumonia.
Preparedness Hacks: Once a nuke is heading your way, you might think that there isn’t much left to do, but you would be wrong!
In the developed world, tetanus is quite uncommon. Being punctured by a rusty metal object certainly isn’t an everyday occurrence, and even if you do suffer an injury that makes tetanus a concern, tetanus vaccines are readily available.
However, in a disaster scenario where the likelihood of an unsanitary injury is much higher and access to the vaccine is no longer an option, tetanus becomes a much more serious concern.
Symptoms of tetanus include difficulty swallowing, stiffness in the neck and jaw, fever, high blood pressure, and sweating. If untreated, tetanus can make it extremely difficult to breathe, eventually leading to death.
In the absence of a tetanus vaccine, antibiotics can be used to treat tetanus with varying degrees of effectiveness. The best way to treat tetanus, though, in the absence of a vaccine is to try and prevent it by thoroughly cleaning any wound with alcohol or another antiseptic and covering it with a bandage.
6. Tuberculosis
Thanks to modern medicine, tuberculosis cases are extraordinarily rare in developed countries. In the developing world, though, tuberculosis is still a common and dangerous killer. Should a major disaster set the country back to a third-world state, tuberculosis could make a frightening comeback.
Symptoms of tuberculosis include blood-tinged coughing, night sweats, fever, and weight loss. Compared to most deadly diseases, though, the symptoms of tuberculosis can appear minor at first, making them hard to spot. Tuberculosis is a slow killer, but it is an efficient one nevertheless.
In the absence of modern medicine, there is no proven treatment for tuberculosis. Unless the right antibiotics are administered at the right times on the right schedule, the infection will develop an antibiotic resistance and become impossible to cure. This makes avoiding tuberculosis the best course of action in an SHTF scenario.
Take precautions when you’re around other people, especially if they are exhibiting signs of tuberculosis such as a bloody cough.
7. E.Coli
Many efforts have been taken within the agricultural industry and water sanitation industry to prevent the spread of the deadly bacteria E.coli. In a scenario where people begin to get their food and water from less trustworthy sources, though, E.coli infection becomes a major concern.
Symptoms of E.coli infection include nausea, vomiting, stomach cramps, bloody diarrhea, and a fever in excess of 100 degrees Fahrenheit. Thankfully, E.coli infections can often be treated with only home care, making this one of the more survivable diseases that you are likely to encounter in a disaster scenario. Plenty of fluids and bed rest is most likely all it will take to ride out the infection.
To prevent coming down with an E.coli infection in the first place, boil or otherwise purify your water and try to only eat food from trusted sources.
8. Measles
Modern medicine has almost wiped out the threat of measles entirely, and the World Health Organization projects that the disease could be eliminated completely by as early as 2020. Should a major setback come between now and then, measles would be poised for a deadly comeback.
Measles is highly contagious, meaning that all it would take for an outbreak is a few infected individuals in a world where measles vaccines are no longer prevalent.
Symptoms of measles include pain in the muscles, a skin rash, fever, sore throat, and a cough. Measles can also lead to blindness, encephalitis, and fatal respiratory infections. Short of preventing measles with a vaccine, there is no proven treatment for the infection. Fever reducers and vitamin A can be used to reduce its symptoms, though.
The best course of action for avoiding measles in the event of an outbreak is to follow good hygiene practices and avoid anyone with a skin rash resembling that caused by measles.
9. Flu
Even today and even in modern countries, the flu is incredibly common. What sets this infection apart and makes it so difficult to prevent is the rate at which it mutates. Every year, a new flu vaccine must be developed in order to prevent the latest mutation, and even then there is a lot of guesswork involved in regards to which form the virus will take.
There are two factors, however, that make the flu much more of a concern in an SHTF scenario: lack of vaccines and lack of treatment. In a scenario where the healthcare community is unable to develop a vaccine for the flu’s latest mutation, flu outbreaks are likely to become much more common. If left untreated, the flu can be fatal – especially in the elderly and the young.
Symptoms of the flu include aching muscles, chills, fever, sweating, and congestion.
All of this is bad enough, but it also assumes that the flu will take a form similar to the form it takes each year. The reality is, there are much more serious forms that the flu can take. In 1918, the Spanish flu infected an estimated 500 million people – one-third of the world’s population – and killed an estimated 50 million of those that it infected.
There is another strain of flu, though, that could dwarf the lethality of the Spanish flu – avian flu. The mortality rate of avian flu sits at a terrifying 60% – and that’s with modern medicine and appropriate treatment.
The only thing keeping avian flu from being a world-ending threat is the fact that it is very difficult to spread. However, a few mutations could change that in a matter of years.
Suffice it to say that the flu will be a major concern in an SHTF scenario, even if it is in its common, easily treatable form. If, however, we are hit with a pandemic of a flu strain such as avian flu in a world already crippled by another disaster, the results could easily be apocalyptic.
All of this should remind you how crucial it is to purify water and keep yourself clean when the SHTF. Here are some resources to help you:
Every generation is skilled at using the technology of its era. For example, people today are very good at driving cars, using smartphones, setting up home entertainment systems, and so forth. The problem is, if the end of the world as we know it ever happens, all those skills will be useless. The skills of our forefathers, on the other hand, will never be useless.
Below, we’ll take a look at 30 survival skills from our past that have mostly been forgotten today. If you want to be able to survive in a world where relying on technology isn’t an option, these skills are certainly worth learning.
Note: For each skill, I included links to resources where you can learn how to develop that skill.
1. Hand Washing Clothes
These days, almost everyone owns a washer and dryer, and those who don’t are able to rely on a visit to the laundromat. Washing clothes without these conveniences, though, is a forgotten skill.
2. Marksmanship
Being able to accurately fire a gun is a skill that takes dedication and practice. At one time, it was an essential skill for survival. Today, though, few people know their way around a firearm.
3. Navigating Without a GPS
GPS’s have made navigation incredibly easy. But now that almost everyone has a powerful GPS in their pocket at all times, not many people know how to navigate without one.
4. Building a Fire
Building a fire isn’t as easy as they make it look in the movies. Even with the right tools and ideal conditions, getting a fire started can sometimes be a challenge – and it’s a skill that few people today have acquired.
5. Hunting
Prey animals have spent their entire lives avoiding predators, and they are very talented at it – which makes hunting a real challenge. In an era where fresh meat is always a trip to the supermarket away, hunting has become a forgotten skill.
6. Fishing
Fishing may be a slightly easier skill to acquire than hunting, but it still requires a lot of learning and practice. Without the right gear and strategy, fish can be very difficult to catch.
7. Purifying Water
Constant access to clean, pure drinking water is a very modern convenience. In the past, though, knowing how to purify water was essential for survival.
8. Preserving Food
Thanks to our abundant supply of food as well as the invention of freezers and refrigerators, knowing how to preserve food is no longer a necessity. Without these modern-day conveniences, though, food preservation is essential for survival.
9. Tying Knots
Everyone knows how to tie a knot in a string, but few people these days are able to tie a wide range of more-complicated knots.
Outside of farmers, few people raise their own animals these days. However, animal husbandry still remains a very useful skill to know.
11. Sewing
Sewing used to be a skill that almost all women and even many men were taught at an early age. Today, though, few people know even the simplest sewing methods.
12. Cooking from Scratch
Putting together meals is now easier than it has ever been in the past, but this also means that most people have forgotten the skills necessary to cook at a tasty, healthy meal from scratch.
13. Predicting the Weather
Today, figuring out what the weather is going to be like is as easy as turning on the television or pulling up an app on your phone. In the past, though, being able to predict the weather without these modern conveniences was essential for survival.
14. Self Defense
There was a time when it was common for fathers to teach their sons how to defend themselves. Today, self-defense is an important skill for men and women alike, but it is certainly less common for people to know.
15. Butchering An Animal
Even if you know how to raise your own animals for meat, you’ll also need to know how to butcher them. This is a more complicated process than many people realize and it’s a skill that must be acquired. (Here are 23 survival uses for honey that you didn’t know about.)
16. Using Cloth Diapers
Before the days of disposable diapers, cloth diapers were all that was available. If the day comes when you can no longer purchase disposable diapers, learning how to use cloth diapers is going to be a necessity.
17. Gardening
Our abundance of food and the ease in which we are able to acquire it has eliminated the need for many skills, including gardening. As far as survival skills go, though, gardening is one of the most important.
18. Keeping Yourself Entertained
We have so many sources of entertainment and distraction these days that not many people are comfortable entertaining themselves without outside stimulation. In a world without electronics, knowing how to keep yourself entertained is very useful.
19. Mechanic Work
Though we are very reliant on mechanical things, not many people know how to work on them without the help of a professional. At one time, though, most everyone knew how to repair their own cars, motorcycles, and other mechanical products.
20. Bartering
We aren’t used to having to barter for the things we buy today, but bartering used to be a way of life. It’s an important skill to know should we ever have to go back to purchasing things locally rather than buying them from a nationwide chain.
21. First Aid
Thanks to the convenience of modern medicine, few people have to worry about treating their own wounds. Nevertheless, first aid remains one of the most valuable forgotten skills that a person can learn.
22. Keeping Warm
Not many people today have to worry about dying of hypothermia. But in the past, knowing how to keep warm – both inside and outside the home – was essential for survival.
23. Making Do With What You Have
We live in an era of excess. If we ever return to a time when life isn’t so full of plenty and abundance, many people will struggle to adapt.
24. Making Cleaning Products
People didn’t used to purchase pre-made cleaning products from the store. Instead, they made their own cleaning products with the raw materials that were available at the time.
25. Home Maintenance
In the past, when something broke down in the home, people would fix it themselves. Today, however, the skills of home maintenance are only known by a select few.
26. Building a Shelter
Knowing how to build an effective shelter is key to wilderness survival. During the times where people would travel out into the woods without the convenience of a portable tent, knowing how to build a shelter was a vital skill.
27. Driving a Vehicle With a Manual Transmission
Automatic transmissions haven’t always been around, and there was a time when everyone drove a manual. Today, the ability to drive a vehicle with a manual transmission is becoming increasingly less common.
28. Locating a Campsite
Not every spot in the woods is suited for a campsite, and choosing the right spot to set up camp is a skill in and of itself.
29. Avoiding Panic
We live very comfortable lives compared to the lives of our ancestors, which means that most people today are a lot more likely to panic when things take a turn for the worse.
30. Repurposing Items
Throwing things away used to be unheard of. Instead, people would repurpose old items and find new ways to make use of them.
Conclusion
Even mastering just a few of these skills will put you leagues ahead of the average person, thus giving you a much greater chance of survival after a disaster. Pick one that interests you the most and start practicing. Once you get a little burnt out on it, move on to a different skill. Just be sure to get back to the first one later. With this list of survival skills, you’ll never be bored again!
Preparedness Hacks: Once a nuke is heading your way, you might think that there isn’t much left to do, but you would be wrong!