LIBERA NOS A MALO
Considerations on the Great Reset and the New World Order
No one will be part of the New World Order
unless he carries out an act of worship to Lucifer.
No one will enter the New Age unless he receives Luciferian initiation.
David Spangler
Director of the United Nations Planetary Initiative Project
(Reflections on The Christ, Findhorn, 1978)
For more than a year and a half we have been helplessly witnessing the succession of incongruent events to which most of us are unable to give a plausible justification.
The pandemic emergency has made particularly evident the contradictions and illogicalities of measures nominally intended to limit contagion – lockdowns, curfews, closures of commercial activities, limitations of public services and classes, suspension of citizens’ rights – but which are disavowed daily by conflicting voices, by clear evidence of ineffectiveness, by contradictions on the part of the same health authorities. There is no need to list the measures that almost all the governments of the world have taken without achieving the promised results. If we limit ourselves to the presumed advantages that the experimental gene serum should have brought to the community – above all immunity to the virus and renewed freedom of movement – we discover that an Oxford University study published in The Lancet stated that the viral load of those vaccinated with a double dose is 251 times greater than the first strains of the virus, despite the proclamations of world leaders, starting with the Italian Prime Minister Mario Draghi, according to whom “whoever gets vaccinated lives, whoever does not get the vaccine dies.” The side effects of the gene serum, cleverly disguised or deliberately not registered by the national health authorities, seem to confirm the danger of taking the vaccine and the disturbing unknowns for the health of citizens, which we will soon have to face.
From science to scientism
The art of medicine – which is not science, but the application of scientific principles to different cases each time, on an experiential and experimental basis – seems to have renounced its prudence, in the name of an emergency that has risen to the level of priesthood of a religion – the religion of science, in fact – which in order to be such has cloaked itself in a dogmatism bordering on superstition. The ministers of this cult have constituted themselves as a caste of untouchables, exempt from any criticism even when their claims are denied by the evidence of the facts. The principles of medicine, considered universally valid until February 2020, have given way to improvisation, to the point of being advised to vaccinate at the height of the pandemic, the obligation of masks being imposed although they are useless, the arbitrary mandating of bizarre distances, the prohibition of treatments with effective drugs and the imposition of experimental gene therapies in violation of normal safety protocols. And just as there are new Covid priests, so there are also new heretics, that is, those who reject the new pandemic religion and want to remain faithful to the Hippocratic Oath. Not infrequently, the aura of infallibility that surrounds virologists and other more or less titled scientists does not seem to be questioned due to their conflicts of interest or by the substantial financial benefits received by pharmaceutical companies, which under normal conditions would be scandalous and criminal.
What many fail to understand is the inconsistency between the stated aims and the means that are adopted in a constantly changing manner in order to achieve them. If in Sweden the absence of lockdowns and masks did not lead to higher infection rates than those in countries where people have been confined to their homes or where they have had masks put on even in primary schools, this element is not considered as proof of ineffectiveness of the measures. If in Israel or in Great Britain mass vaccination has increased infections and made them more virulent, their example does not induce the rulers of other countries to be cautious in the vaccination campaign, but rather pushes them to evaluate the mandatory nature of their giving of the vaccine. If ivermectin or hyperimmune plasma prove to be valid treatments, this is not enough to authorize them, let alone recommend them. And those who wonder the reason for this disconcerting irrationality end up refraining from judgment, giving a sort of fideistic acceptance to the pronouncements of the Covid priests, or conversely considering doctors as unreliable sorcerers.
A single script under a single direction
As I said earlier, we are faced with a colossal deception, based on lies and fraud. This deception starts from the premise that the justifications put forward by the authorities in support of their actions are sincere. More simply, the mistake consists in believing that the rulers are honest and in assuming that they do not lie to us. So we persist in finding more or less plausible justifications, with the sole purpose of not recognizing that we are the object of a conspiracy planned to the smallest detail. And while we try to rationally explain irrational behavior, while we attribute logic to the illogical actions of those who govern us, cognitive dissonance leads us to close our eyes to reality and to believe the most shameless lies.
We should have understood – I wrote it some time ago – that the Great Reset plan was not the result of the ravings of some “conspiracy theorist” but the crude evidence of a criminal plan, conceived for decades and aimed at establishing a universal dictatorship in which a minority of immeasurably rich and powerful people intends to enslave and subjugate the whole of humanity to the globalist ideology. The accusation of “conspiracy theory” could perhaps have made sense when the conspiracy was not yet evident, but today denying what the elite has planned since the 1950s is unjustifiable. What Kalergi, the Rothschilds, the Rockefellers, Klaus Schwab, Jacques Attali and Bill Gates have been saying since World War II has been published in books and newspapers, commented on and taken up by international bodies and foundations, made up precisely by parties and government majorities. The United States of Europe, uncontrolled immigration, the reduction of wages, the cancellation of trade union guarantees, the renunciation of national sovereignty, the single currency, the control of citizens under the pretext of a pandemic, and the reduction of the population through the use of vaccines with new technologies are not recent inventions, but the result of a planned, organized and coordinated action – an action that clearly shows itself perfectly adhering to a single script under a single direction.
The criminal mens
Once it is understood that the present events have been intended in order to obtain certain results – and consequently to pursue certain interests on behalf of a minority part of humanity, with incalculable harm for the majority – we must also have the honesty to recognize the criminal mens [mind] of the authors of this plan. This criminal design also makes us understand the fraud perpetrated by civil authority in presenting certain measures as an unavoidable response to unpredictable events, when the events have been artfully created and magnified with the sole purpose of legitimizing a revolution – which Schwab identifies as the fourth industrial revolution – intended by the elite to the detriment of all humanity. The enslavement of authority is on the other hand the result of a process that began even earlier, with the French Revolution, and which made the political class the servant not of God (whose Lordship it disdainfully disregards) nor of the sovereign people (which it despises and uses only to legitimize itself), but of the economic and financial potentates, of the international oligarchy of bankers and usurers, of multinationals and pharmaceutical companies. In reality, on closer inspection, all these subjects belong to a small number of well-known very rich families.
Equal enslavement is also evident in the media: journalists have accepted – without any scruple of conscience – prostituting themselves to the powerful, going so far as to censor the truth and spread shameless lies without even trying to give them the appearance of credibility. Up until last year journalists counted the numbers of the “victims” of Covid by presenting anyone who tested positive as terminally ill; today those who die after being vaccinated are always and only taken by a vague “illness,” and even before the post mortem examinations, they officially decide that there is no correlation between a person’s death and the administration of the gene serum. They twist the truth with impunity when it does not confirm their narrative, bending it to fit their purposes.
What has been happening for a year and a half had been widely announced, down to the smallest detail, by the creators of the Great Reset themselves; just as we were told the measures that would be adopted. On February 17, 1950, testifying before the United States Senate, the well-known banker James Warburg said,
“We will have a world government, whether you like it or not. The only question that arises is whether this world government will be established by consensus or by force.”
Four years later, the Bilderberg Group was born, which has counted among its members characters such as [Italian businessman Gianni] Agnelli, Henry Kissinger, Mario Monti, and the current Italian Prime Minister Mario Draghi. In 1991, David Rockefeller wrote:
“The world is ready for a world government. The supranational sovereignty of an intellectual elite and world bankers is certainly preferable to the national self-determination practiced in past centuries.”
And he added: “We are on the verge of a global transformation. All we need is the ‘right’ global crisis and the nations will accept the New World Order.” Today we can affirm that this “right crisis” coincides with the pandemic emergency and with the “lockstep” outlined since 2010 by the Rockefeller Foundation document “Scenarios for the Future of Technology and International Development,” in which the events we are now witnessing are all anticipated.
In short, they have created a false problem in order to be able to impose population control measures as an apparent solution, cancel small and medium-sized businesses with lockdowns and the green pass to the benefit of a few international groups, demolish education by imposing distance learning, lower the cost of manpower and employees with “smart working,” privatize public health for the benefit of Big Pharma, and allow governments to use the state of emergency to legislate in derogation of the law and impose so-called vaccines on the entire population, making citizens traceable in all their movements and either chronically ill or sterile.
Everything the elite wanted to do, they have done. And what is incomprehensible is that in the face of the evidence of the premeditation of this terrible crime against humanity, which sees the leaders of almost the whole world as accomplices and traitors, there is not a single magistrate who opens a file against them to ascertain the truth and condemn the guilty and complicit. Those who disagree are not only censored but pointed out as public enemies, as infectors, as non-persons for whom no rights are recognized.
Deep state and deep church
Now, in the face of a criminal plan, it would be at least logical to denounce it and make it known, in order to then be able to avert it and try those who are guilty. The list of traitors should start with the heads of government, with cabinet members and elected officials, and then continue with the virologists and corrupt doctors, the complicit officials, the leaders of the armed forces incapable of opposing the violation of the Constitution, the sold-out journalists, the cowardly judges and the obsequious unions. In that long list that will perhaps be drawn up one day, the leaders of the Catholic Church should also be listed, starting with Bergoglio and not a few of the Bishops, who have become zealous executors of the will of the prince against the mandate received from Christ. And certainly, in that list, one would know the extent of the conspiracy and the number of the conspirators, confirming the crisis of authority and the perversion of civil and religious power. In short, it would be understood that the corrupt part of the civil authority – the deep state – and the corrupt part of ecclesiastical authority – the deep church – are two sides of the same coin, both instrumental to the establishment of the New World Order.
However, in order to understand this alliance between civil and religious power, it is necessary to recognize the spiritual and eschatological dimension of the present conflict, framing it in the context of the war that Lucifer, ever since his fall, has waged against God. This war, whose outcomes have been decided ab æterno with the inexorable defeat of Satan and the Antichrist and the overwhelming victory of the Woman encircled with the stars, is now approaching its conclusion. This is why the forces of darkness are so wild at present, so impatient to cancel the name of Our Lord from the earth, to not only destroy his tangible presence in our cities by tearing down churches, demolishing crosses, and suppressing Christian holidays; but also by eliminating memory, cancelling Christian civilization, adulterating its teaching, and debasing its worship. And in order to do this, the presence of a faithful and courageous Hierarchy, ready to suffer martyrdom in order to defend Christian faith and moral teaching, is certainly an obstacle. This is why, from the very initial phase of the globalist plan, it was essential to corrupt the Hierarchy in morals and doctrine, to infiltrate it with fifth columns and sleeper cells, to deprive it of any supernatural yearning, and to make it vulnerable to blackmail thanks to financial and sexual scandals; all with the purpose of excluding it and eliminating it once its purpose has been achieved, according to established practice.
This infiltration operation began at the end of the 1950’s, when the project of the New World Order was just taking shape. It began its own work of subversion a few years later, with the Second Vatican Ecumenical Council, in view of which the election of Roncalli and the expulsion of Cardinal Siri, Pacelli’s “dauphin” or probable successor as pope, represented a reason for enthusiasm both for the progressive and modernist element within the Church, as well as for the communist, liberal, and Masonic element of the civil world. Vatican II represented within the ecclesial body what the Tennis Court Oath [of the French Revolution] was for civil society: the beginning of the Revolution. And if on many occasions I have drawn attention to the subversive nature of the Council, today I believe that a historical analysis deserves attention in which apparently disconnected facts acquire a disturbing significance, explaining many things.
Liaisons dangereuses
As Michael J. Matt has reported in a recent video at The Remnant, today we are beginning to put together all the pieces of the mosaic, and we discover – by the very admission of one of the protagonists – that Msgr. Hélder Câmara, Archbishop of Olinda and Recife in Brazil, had a meeting in those years with the young Klaus Schwab, the founder of the World Economic Forum and theorizer of the Great Reset. Once Schwab recognized Câmara for his opposition to the traditional Church and his revolutionary and pauperist theories, he invited him to the Davos Forum, considering his participation in this event as extremely important in view of the project of the New Order. We know that Hélder Câmara was among the organizers of the “Pact of the Catacombs,” which was signed by about forty ultra-progressivist Bishops on 16 November 1965, a few days before the closing of the Council. Among the heretical theses of that document, there is also collaboration in the establishment of “another, new social order”, n. 9) based on justice and equality. And we are not surprised to learn that among the signatories there was also Msgr. Enrique Angelelli, the auxiliary bishop of Cordoba in Argentina, “[a] point of reference for then-Father Jorge Mario Bergoglio”. Bergoglio himself declared right from the beginning of his Pontificate that he agreed with the demands of the Pact of the Catacombs. On 20 October 2019, during the Synod on the Amazon, the celebration of the pact between the conspirators was repeated in the Catacombs of Santa Domitilla, confirming that the plan begun at the Council had found fulfillment precisely in Jorge Mario Bergoglio. Far from distancing himself from the ultra-progressivists who support him and who determined his election at the last Conclave, Bergoglio never misses an opportunity to give proof of his perfect coherence with the plan of the New World Order, beginning with the collaboration of Vatican commissions and dicasteries with environmentalism of a Malthusian matrix and their participation in the Council for Inclusive Capitalism, a global alliance with the Rothschilds, the Rockefeller Foundation, and large banks. So on the one hand we have David Rockefeller with the Trilateral Commission, and on the other we have Klaus Schwab, who is related by marriage with the Rothschilds (here), with the World Economic Forum, and both of them are arm-in-arm with the head of the Catholic Church to establish the New Order by means of the Great Reset, as has been planned since the 1950’s.
The world depopulation plan
Among the associates of this pactum sceleris there must also be counted some members of the Pontifical Academy for Life, which recently had its organizational structure overturned by Bergoglio himself when he removed the members who were most faithful to the Magisterium, replacing them with supporters of depopulation, contraception, and abortion. There should be no surprise at the Holy See’s support for vaccines: in June 2011 the Sovereign Independent carried the headline on its front page: “Depopulation Through Forced Vaccination: The Zero Carbon Solution!” (here). Beside the headline, a photograph of Bill Gates was accompanied by a quote from him: “The world today has 6.8 billion people. That’s headed up to about 9 billion. Now if we do a really great job on new vaccines, health care, reproductive services [abortion and contraception], we lower that by perhaps 10 or 15 percent.” This is what Bill Gates said eleven years ago. Today he is one of the shareholders of the Black Rock group that finances the pharmaceutical companies that produce the vaccines, one of the main sponsors of the World Health Organization (WHO), and also of a myriad of public and private entities connected to health. At his side we curiously find George Soros, the “philanthropist” of the Open Society, which together with the Bill and Melinda Gates Foundation recently invested in a British company that produces swabs for Covid testing. And since we are talking about economic issues, I would like to recall that the Holy See has held shares worth about €20 million in two pharmaceutical companies that have produced a contraceptive drug, and more recently it invested in a fund that guaranteed very high profits in the event of a geopolitical or pandemic crisis thanks to speculation on international currencies, the “Geo-Risk” fund managed by the Merrill Lynch investment bank, which had to close it because of its skyrocketing yields after the first few months of the pandemic. Other capital, coming from the “Peter’s Pence” collection, had been used to finance various other initiatives, even collaborating with [Italian businessman] Lapo Elkann, whose endeavors include Rocketman, the autobiographical film of Elton John. To say nothing of the real estate speculations and the purchase of the London building at 60 Sloane Avenue that the news coverage has amply informed us on, a purchase that I know, from a reliable source, was decided on by Bergoglio himself. And then there’s China: always in the name of “coherence” and the “church of the poor for the poor” that is so dear to Bergoglio’s heart, there are those who believe that the secret Accord prepared by the Jesuits and former-Cardinal Theodore McCarrick may have obtained substantial funding from the communist regime in Beijing in exchange for the Vatican’s silence over the persecution of Catholics and the violation of human rights.
Deep state interference
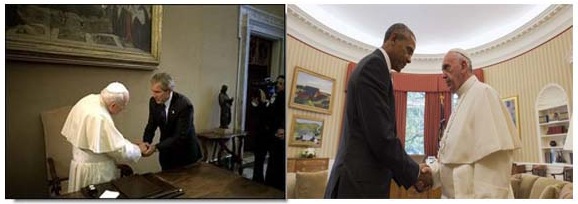
There have been manifold examples of interference by the deep state in the life of the Church. We cannot forget the emails of John Podesta and Hillary Clinton, which show the intention to oust Benedict XVI from the papacy and so to initiate a new “springtime of the Church” that would be progressivist and globalist, which later came about with the resignation of Benedict and the election of the Argentine. Nor can we overlook the interference of entities and institutions that are anything but close to religion, such as the B’nai B’rith, in dictating the direction of the “renewal” of the Church after Vatican II and most of all under this Pontificate. Finally, we should remember on the one hand the disdainful refusals to grant audiences to conservative political and institutional personalities, and on the other hand the passionate smiling encounters with leaders of the Left and of progressivism, along with expressions of enthusiastic satisfaction on the occasion of their election. Many of them owe their success to having attended universities run by the Society of Jesus or circles of Catholicism that in Italy would be called Dossettian,1 where the network of social and political relations constitutes a sort of progressive Freemasonry and ensures dazzling careers for so-called “adult Catholics,” those who use the name “Christian” without behaving consistently with Christian faith and morality in their service of public affairs: Joe Biden and Nancy Pelosi; Romano Prodi, Mario Monti, Giuseppe Conte, and Mario Draghi; to name only a few. As we can see, the cooperation between the deep state and deep church is long-standing and has now produced the results hoped for by its supporters, with very serious damage to both the State and religion.
The closure of churches in early 2020, even before the civil authorities imposed the lockdowns; the prohibition of the celebration of Masses and the administration of the Sacraments during the pandemic emergency; the grotesque ceremony performed on 27 March 2020 in Saint Peter’s Square; the insistence on vaccines and their promotion as morally legitimate despite having been produced with cell lines originating with aborted fetuses; Bergoglio’s declarations that the genetic serum represents a “moral duty” for every Christian; the introduction of the “Green Pass” health passport in the Vatican and more recently in Catholic schools and in some seminaries; the Holy See prohibiting Bishops from announcing that they are against the vaccination obligation, promptly endorsed by certain Bishops’ Conferences – these are all elements that demonstrate the subordination of the deep church to the orders of the deep state, and the way in which the Bergoglian church is an integral part of the globalist plan. If we combine all this with the idolatrous cult of the pachamama right under the arches of Saint Peter’s Basilica; the insistence on irenicist ecumenism, pacifism, and pauperism; the endorsement of situation ethics and the substantial legitimization of adultery and concubinage in Amoris Laetitia; the declaration that the death penalty is morally illicit; the endorsement of left-wing politicians, revolutionary leaders, and abortion activists; the words of understanding for LGBT issues, homosexuals, and transsexuals; the silence over the legitimization of homosexual unions and the even more disconcerting silence over the blessing of sodomitical couples by German Bishops and priests; and the prohibition of the Tridentine Mass with the abolition of Benedict XVI’s Motu Proprio Summorum Pontificum, we realize that Jorge Mario Bergoglio is carrying out the task entrusted to him by the globalist elite, which wants him to be the liquidator of the Catholic Church and the founder of a philanthropic and ecumenical sect of Masonic inspiration that is meant to constitute the Universal Religion in support of the New Order. Whether this action is being carried out with full awareness, out of fear, or under blackmail, nothing detracts from the gravity of what is happening, nor from the moral responsibility of those who promote it.
The Luciferian matrix of the New World Order
At this point, it is necessary to clarify what is meant by the “New World Order,” or rather what its creators mean, regardless of what they say publicly. Because on the one hand, it is true that there is a project, that certain people conceived it and are charged with carrying it out; but on the other hand, it is also true that the inspiring principles of the project are not always disclosed, or at least they cannot be openly admitted to be closely related to what is happening today, since such an admission would arouse opposition even from those who are the most peaceful and moderate. It is one thing to impose the “Green Pass” with the excuse of the pandemic; but it is quite another to recognize that the purpose of the passport is to accustom us to being tracked; and still another to say that this total control is the “mark of the Beast” of which the Book of the Apocalypse speaks (Rev 13:16-18). The reader will forgive me if, in order to demonstrate my argument, I must resort to using quotations of such gravity and wickedness that they arouse bewilderment and horror – but this is necessary if we are to understand what the real intentions of the architects of this plot really are, and the true nature of the epochal battle they are waging against Christ and His Church.
In order to understand the esoteric roots of the thought that lies at the foundation of the United Nations, once longed for by [19th-century Italian political activist] Giuseppe Mazzini, we cannot fail to consider characters such as Albert Pike, Eliphas Levi, Helena Blavatsky, Alice Ann Bailey, or other disciples of Luciferian sects. Their writings, published since the late nineteenth century, are quite revealing.
Albert Pike, a friend of Mazzini and a fellow Freemason, gave an address in 1889 in France to the highest levels of Freemasonry, which was then reprinted on 19 January 1935 by the English journal The Freemason. Pike declared:
That which we must say to the crowd is, we worship a god, but it is the god one adores without superstition […]. The Masonic religion ought to be maintained in the purity of Luciferian doctrine by all of us who are initiates of the highest degrees. If Lucifer were not God, would Adonay [sic] [the God of the Christians] whose deeds prove his cruelty, perfidy and hatred of man, barbarism and repulsion of science, would Adonay and his priest calumniate him?
“Yes, Lucifer is God, and unfortunately Adonay is also God. For the eternal law is that there is no light without shade, no beauty without ugliness, no white without black, for the absolute can only exist as two gods: darkness being necessary to light to serve as its foil as the pedestal is necessary to the statue, and the brake to the locomotive… the doctrine of Satanism is a heresy; and the true and pure philosophical religion is the belief in Lucifer, the equal of Adonay; but Lucifer, God of Light and God of Good, is struggling for humanity against Adonay, the God of Darkness and Evil.
This profession of faith in the divinity of Satan is not only an admission of who the real Great Architect that Freemasonry adores is, but also a blasphemous political project that passes through the ecumenism of Vatican II, whose first theorist was Freemasonry:
The Christian, the Jew, the Moslem, the Buddhist, the follower of Confucius and Zoroaster can unite as brothers and join together in prayer to the only god who is above all the other gods (cf. Albert Pike, Morals and Dogma, ed. Bastogi, Foggia 1984, vol. VI, p. 153).
And the identity of the “only god who is above all the other gods” has been well explained in the preceding quotation.
In another letter, Pike wrote to Mazzini:
We will unleash the nihilists and atheists and provoke a formidable social cataclysm that will clearly demonstrate to the nations, in all its horror, the effect of absolute atheism, the origin of barbarism and bloody subversion. Then citizens everywhere, forced to defend themselves against a world minority of revolutionaries, […] will receive the true light through the universal manifestation of the pure doctrine of Lucifer, finally revealed to the public’s view; a manifestation that will be followed by the destruction of Christianity and also of atheism, which will be conquered and crushed at the same time! (cf. Letter of 15 August 1871 to Giuseppe Mazzini, Library of the British Museum, London).
It will not escape notice that the “great heresy of separativeness” sounds curiously in agreement with the ecumenism condemned by Pius XI in his Encyclical Mortalium Animos, an ecumenism that was adopted by the Declaration Dignitatis Humanae and recently merged into the doctrine of “inclusivity” formulated by those who allowed idolatrous worship to the pachamama to be offered in Saint Peter’s Basilica. It is clear that the term “separativeness” intends to designate in a negative key the necessary separation of good from evil, of true from false, of the right from wrong that constitutes the criterion of moral judgment of human behavior. “Inclusivity” opposes this distinction, allowing oneself to be deliberately contaminated by evil to adulterate the good, equating the true and the false in order to corrupt the former and give legitimacy to the latter.
The shared ideological roots of ecumenism
If one does not understand that the ideological roots of ecumenism are intrinsically linked to Masonic Luciferian esoterism, one cannot grasp the connection that links the doctrinal deviations of Vatican II to the plan of the New World Order. The revolution of 1968 was a sad example of those pacifist and ecumenist ambitions, in which the “Age of Aquarius” was celebrated by the musical Hair (1969) and then by John Lennon with Imagine (1971):
Imagine there’s no heaven. It’s easy if you try.
No hell below us. Above us only sky.
Imagine all the people, living for today.
Imagine there’s no countries. It isn’t hard to do.
Nothing to kill or die for, and no religion too.
Imagine all the people, living life in peace.
You may say I’m a dreamer, but I’m not the only one.
I hope someday you’ll join us, and the world will be as one.
Imagine no possessions. I wonder if you can.
No need for greed or hunger, a brotherhood of man.
Imagine all the people, sharing all the world.
This manifesto of Masonic nihilism can be considered the hymn of globalism and the new universal religion: it is no coincidence that it was used as the theme song for the 2012 Olympic Games in London, and more recently for those in Tokyo. A soul that is not led astray can only feel horror at these blasphemous words. The same is true for the words of Lennon’s no-less-blasphemous song God (1970):
God is a concept by which we measure our pain. […]
I just believe in me.
I understand that for many it is distressing to accept that the Hierarchy may have allowed itself to be deceived by its enemies, making their requests their own in questions that touch the very soul of the Church. It is certain that there were Masonic prelates who succeeded in introducing their ideas into the Council by disguising them, but in the full awareness that they would inexorably lead to the realization of that demolition of Religion that is the premise for the establishment of the New Era – the Age of Aquarius – in which Our Lord is banished from society in order to welcome the Antichrist. One can then understand the winking indulgence given to Freemasonry by many Catholic personalities – I am thinking of Cardinals Martini and Ravasi, among the many – and their opposition to the excommunications that the Popes renewed against the sect. One also understands the reason for the enthusiasm of the Masonic Lodges at the election of Bergoglio, and conversely their ill-concealed hatred toward Benedict XVI, considered as the kathèkon [“the one who restrains” (cfr. 2 Thess 6:7)] to be eliminated.
It should also be remembered, with some embarrassment, that certain statements by Ratzinger suggest an attempt to “Christianize” the globalist project, without condemning it as antichristic and anti-Christian:
Let the Child of Bethlehem take you by the hand! Do not fear; put your trust in him! The life-giving power of his light is an incentive for building a new world order.
These words, unfortunately, confirm the fallacy of Hegelian thought, which influenced the professor from Tubingen right up to the Throne. Certainly the Pontiff’s failure to take a position permitted him to be considered in some way an ally of the globalist plan, if Italian President Giorgio Napolitano was able to affirm in his 2006 year-end address speech to the Italian people: “There is harmony between Pope Benedict and me in supporting a New World Order” (31 December 2006). On the other hand, the Hegelian process of thesis-antithesis-synthesis echoes the motto of alchemy, Solve et Coagula, which was adopted by Freemasonry and by Luciferian esoterism. It is the motto that appears on the arms of Baphomet, the infernal idol adored by the highest levels of the Masonic sect, as is admitted by its most authoritative members. In his essay Lucifer Rising, Philip Jones specifies that the Hegelian dialectic “combines a form of Christianity as thesis with a pagan spiritualism as antithesis, with the result of a synthesis that is very similar to the Babylonian mystery religions.”
The globalist pantheism of Theilard de Chardin
Ecumenism is one of the key themes of globalist thought. This is confirmed by Robert Muller, who was the Assistant Secretary-General of the United Nations: “We must move as quickly as possible towards a one-world government, a one-world religion, and a single world leader.” Before him, one of the advocates of the League of Nations, Arthur Balfour, created the “Synthetic Society,” which had as its purpose the creation of the “one-world religion.” Pierre Theilard de Chardin himself, a Jesuit heretic condemned by the Holy Office and today a celebrated theologian of progressivism, considered the United Nations as “the progressivist institutional incarnation of his philosophy,” expressing his hope that “a general convergence of religions on a universal Christ who fulfills them all….seems to me to be the only possible conversion of the world, and the only form in which a religion of the future can be conceived” in order to “reduce the gap between pantheism and Christianity by drawing out what could be called the Christian soul of Pantheism or the pantheistic aspect of Christianity.” It will not escape notice that the pachamama and the attribution of Marian connotations to Mother Earth turns these concepts of Theilard de Chardin into a disturbing reality. And that’s not all: Robert Muller, the world government theorist who is also a disciple of the theosophist Alice A. Bailey, declares: “Teilhard de Chardin influenced his companion [the Jesuit Father Emmanuel Saguez de Breuvery, who held important positions at the UN], who in turn inspired his colleagues, and they in turn initiated a rich process of global and long-term thought within the United Nations, which has affected many nations and people all over the world. I was profoundly influenced by Teilhard.” In his book The Future of Man, Theilard writes: “Even if its form is not yet visible, tomorrow humanity will wake up in a pan-organized world.” Muller was the founder of the World Core Curriculum, which aimed “to orient our children towards global citizenship, earth-centered beliefs, socialist values and the collective mindset, which are becoming a requirement for the work force of the 21st century” (New Man Magazine). And if he proudly claims Alice A. Bailey among his inspirers, we discover that she was a disciple of the Theosophic Movement founded by Helena Blavatsky, a declared Luciferian. In order to correctly understand Blavatsky’s character, here are a few citations from her writings:
Lucifer represents Life, Thought, Progress, Civilization, Liberty, Independence… Lucifer is the Logos, the Serpent, the Savior.
And, almost anticipating the pachamama:
The Celestial Virgin thus becomes, at the same time, the Mother of Gods and Demons, because she is the ever-loving beneficent Divinity… But in antiquity and in reality the name [of this god] is Lucifer. Lucifer is the divine and earthly Light, both the Holy Spirit and Satan at the same moment.”
And last but not least:
It is Satan who is the god of our planet and the only god.
It was Alice A. Bailey who founded the Lucifer Publishing Company, which is now known as the Lucis Publishing Company, closely related to the Lucis Trust, formerly the Lucifer Trust, recognized as an NGO by the United Nations. If we add to this heap of infernal ramblings the words of David Spangler, the Director of the Planetary Initiative Project of the United Nations, we will realize how terrible is the threat that is hanging over all of us:
No one will be part of the New World Order unless he carries out an act of worship to Lucifer. No one will enter the New Age unless he receives a Luciferian initiation (Reflections on the Christ, Findhorn, 1978).
Alice A. Bailey writes about the New Age:
The achievements of science, the conquests of nations and the conquests of territory are all indicative of the method of the Age of Pisces [the age of Christ], with its idealism, its militancy, and its separativity in all fields – religious, political, and economic. But the age of synthesis, of inclusivity, and understanding is upon us, and the new education of the Age of Aquarius [the age of the Antichrist] must very delicately begin to penetrate the human aura.
Today we see how the teaching methods theorized by Muller in the World Core Curriculum have been adopted by almost all nations, including LGBT ideology, gender theory, and all other forms of indoctrination. This is confirmed by the former director of the WHO, Dr. Brock Chisholm, explaining what the UN educational policy would like to achieve:
In order to achieve a world government, it is necessary to remove from the minds of men their individualism, fidelity to family traditions, national patriotism, and religious dogmas (cf. Christian World Report, Marzo 1991, Vol. 3).
Behold once again the fil rouge that links not only Klaus Schwab to Hélder Câmara, but also Robert Muller and Alice A. Bailey to Pierre Theilard de Chardin and Emmanuel Saguez de Breuvery, always in a globalist key and under the ill-omened inspiration of Luciferian thought. An in-depth analysis of these disturbing aspects will make it possible to shed light on the truth and reveal the complicity and betrayals of not a few churchmen who are enslaved to the enemy.
Our response to the crisis of authority
The corruption of authority is such that it is very difficult – at least in human terms – to hypothesize a peaceful way out. In the course of history, totalitarian regimes have been overthrown by force. It is difficult to think that the health dictatorship that has been established in recent months can be fought differently, since all the powers of the State, all of the means of information, all the international public and private institutions, all of the economic and financial potentates are complicit in this crime.
Faced with this bleak scenario of corruption and conflict of interest, it is indispensable that all those who are not subservient to the globalist plan unite in a compact and cohesive front, in order to defend their natural and religious rights, their own health and that of their loved ones, their freedom, and their goods. Where authority fails in its duties and indeed betrays the purpose for which it has been established, disobedience is not only lawful but obligatory: non-violent disobedience, at least for now, but determined and courageous. Disobedience to the illegitimate and tyrannical diktats of ecclesiastical authority, wherever it shows itself to be an accomplice of the infernal plan of the New World Order.
Conclusion
Allow me to conclude this reflection with a brief spiritual thought. Everything that we know, discover, and understand about the global conspiracy currently unfolding shows us a tremendous reality that is also at the same time sharp and clearly-defined: there are two sides, the side of God and the side of Satan, the side of the children of Light and the side of the children of darkness. It is not possible to come to terms with the Enemy, nor is it possible to serve two masters (Mt 6:24). The words of Our Lord must be engraved in our minds: “Whoever is not with Me is against Me, and whoever does not gather with Me scatters” (Mt 12:30). Hoping to build a world government in which the Divine Kingship of Jesus Christ is outlawed is insane and blasphemous, and no one who has such a plan will ever succeed. Where Christ reigns, peace, harmony and justice reign; where Christ does not reign, Satan is a tyrant. Let us consider this well, whenever we have to choose whether to make agreements with the adversary in the name of a false peaceful coexistence! And let those prelates and civil leaders who think that their complicity only affects economic or health issues, pretending not to know what is behind all this, also consider this well.
Let us turn to Christ, Christ who is the King of hearts, of families, of societies, and of nations. Let us proclaim Him as Our King and Mary Most Holy as Our Queen. Only in this way can the wicked project of the New World Order be defeated. Only in this way can the Holy Church be purified of traitors and renegades. And may God listen to our prayer.