When society collapses, bartering is what’ll keep you and your family alive—it will be as important to your SHTF plan as building a prepper pantry, fortifying your home against threats, and securing a bug out location.
Here’s what you need to know about trading barter items and services:
How Does Bartering Work?
Before money became a thing, bartering was the main way folks did business.
Basically, a dude would head over to the market and trade goods or services in exchange for something a vendor would offer, like a dozen eggs for fancy wine or grains for fresh cheese.
The barter was considered done when both parties agreed that they got a fair deal.
These days, bartering has become a lot less common, but there are still places around the world that practice it. Of course, since this ain’t ancient Greece, folks now trade things like smartphones, kitchen tools, and even cars.
Bartering will start gaining popularity again when SHTF, and by that time, society will be a lot more desperate—which brings us to the next section:
Why Your SHTF Plan Should Include Bartering
During TEOTWAWKI, many common resources will become scarce. Folks will be itching to get their hands on these things.
Think a wad of dollar bills will be worth anything during that time? Heck no.
A roll of toilet paper will be much more valuable.
As you build your stockpile, you should also consider stashing barter items. You’ll have enough to keep your family warm and fed while also having extra to trade for things or services you want. Think of it as insurance that’ll help you survive when money isn’t worth dirt.
You don’t need to wait for things to go south to start bartering. In fact, it would even do you better to practice it now so that you’ll be a master at negotiation by the time S hits the fan.
Here are some tips:
Join online bartering groups.
Do your research. What do you know about this person’s needs? What are they looking for?
Lay down expectations. What exactly do you want out of the exchange?
Try picturing how the meetup will go. How will you get the other guy to accept your offer?
Listen well. While it’s tempting to block out the person’s blabbering, you can use this to your advantage and gain intel about them. You can adopt their mannerisms and speech to build their trust.
Don’t scam the other party. Who knows what they’ll do to get back at you?
Set deadlines to get them to decide faster.
Don’t finalize the deal unless the agreement’s crystal clear for both of you.
Keep reading to get an idea about the things you can barter:
What Can You Barter?
Your success at bartering hinges on what you’ve got to offer. As we mentioned earlier, having an impressive stockpile will help. But besides that, you can also offer your skills and even the stuff you make.
To give you a better picture, here’s what you can barter with others:
Barter Items
Emergency essentials like water and food will never fail to be in demand, but folks will also crave the things that bring them comfort.
We take all these into account in this list of must-have barter items:
Water Filters
Typically, people can only survive 3 days without water, which makes it the most valuable out of all the emergency essentials. While it’s not smart to give your actual water supply to folks outside your family, you can collect a bunch of water filters and purifiers for trading purposes.
Food
Food is another one of the most important barter items you can stockpile. While people will always need staples like beans and rice, don’t underestimate the value of comfort food. Folks would trade a bunch of stuff for chunky peanut butter, a box of mac and cheese, or Twinkies.
Here are some of the food you can barter:
Canned goods
Rice
Beans
Nuts
Honey
Peanut butter
Cocoa
Freeze-dried food
Spices
Salt
Sweets
Chocolate
Chips
Fruits, veggies, and herbs from your survival garden
Fire Starters
Without fire, life’s gonna suck big time. You’ll either get salmonella from eating uncooked food, lose your way in the dark, or turn into a human icicle.
That’s why fire starters have a spot on this list of top barter items. Folks would be happy to trade almost anything for a ferro rod, BIC lighter, or waterproof matches.
Personal Care Supplies
A major disaster won’t stop most folks from wanting to look and feel clean. Heck, they’d willingly risk their lives for the last roll of toilet paper at Costco. You can bet these barter items will be highly coveted:
Toilet paper
Bar soap
Hand sanitizer
Shampoo
Hairbrushes
Combs
Lotion
Feminine hygiene products
Shaving cream
Razors
Diapers
Toothpaste
Toothbrushes
Dental floss
Cotton swabs
Chapstick
Condoms
‘Nuff said.
Garbage Bags
Garbage bags are versatile little things. They can catch rainwater, cover leaks, and of course, store waste—among other things. These uses make them ideal to have in emergencies.
Blankets
There’s nothing wrong with using a tarp as a makeshift blanket, but nothing beats a real one. It just helps you sleep better at night.
Tea and Coffee
Most people need caffeine to start the day. Without it, they’re more terrifying than any horror movie villain. But when disaster strikes, they’ll need coffee and tea even more. These will give them the energy to stay focused and alert.
Take pity on your neighbors and fill that caffeine void in their hearts. We’re sure they’d barter pretty much anything for it.
Booze
A disaster’s tough for anyone. While there are different ways to cope, sometimes, only a nice drink can take the edge off. You’re not just the one person who feels that way. The old guy down the street and that one lady with all those kids also feel the same.
As you can see, alcohol is gonna be extra valuable—and not only as a drink. It’s got other uses, too, like fueling a fire and as an antiseptic.
Duct Tape
A roll of this tape can do many things, like making cordage, repairing glasses that have broken in half, and fashioning a tourniquet. It’s versatile, lightweight, and won’t cost you much—making it one of the best barter items.
Meds
Basic over-the-counter meds will be hard to come by during TEOTWAWKI, as pharmacies and convenience stores may run out of them. Here are some of the meds you should stock up on:
Pain relievers
Antihistamines
Antacids
Decongestants
Anti-diarrheals
Antifungal meds
Basic First Aid Supplies
Folks can get seriously injured during catastrophes, so first aid supplies are gonna be high-value barter items that can save their lives.
Bandages
Cotton swabs
N95 masks
Gloves
Splints
Scissors
Hot and cold packs
Baby Supplies
It goes without saying that babies need a lot of maintenance. To parents, these barter items would be the ultimate jackpot during SHTF:
Pacifiers
Baby bottles
Formula
Baby clothes
Diapers (whether cloth or disposable)
Diaper rash ointment
Baby wipes
Pet Supplies
Whether it’s a large German Shepherd, a mixed-breed cat, or a tiny mouse named Stuart, pets are members of the family. Their needs are also gonna matter to their owners.
Batteries
Without electricity, people will rely on batteries to power things like radios and flashlights. You can stash away a lot of them, but make sure you check every now and then for expired ones.
Radios
During a catastrophe, a radio may be the only way to get important updates and information. It’s an essential item that non-preppers might overlook.
Flashlights
Average joes never seem to have enough flashlights and in most cases, their lights are about as reliable as your granddad’s ancient jalopy. In that case, we’re confident that tactical flashlights will be great bartering items. Tactical flashlights are bright and heavy-duty. Plus, many of them are rechargeable.
Clothing
Got a ton of old clothes you don’t wear anymore? Before you donate ’em to your local Goodwill, choose a few to keep for bartering. Folks will definitely be looking for jackets, gloves, and boots when things go south.
Entertainment
We can’t leave out entertainment from this list. Unlike the robots that may take over the world, humans do get bored. And they’ll eventually lose their minds if the only thing keeping them entertained is watching raindrops race down the window.
Board games
Musical instruments
Cards
Paper, pens, crayons, markers, and other coloring supplies
Services
Besides trading barter items, you can barter skills. The more skilled you are, the more opportunities you’ll have.
The best thing about offering your expertise in exchange for goods or services is that you won’t be giving away anything you need. You’ll just be using your hands and your brain.
These examples show how you can use your survival skills to get something in return:
First aid: After patching up someone’s wound, they can pay you back by giving you the juiciest watermelons from their garden.
Cooking and baking: You can make a hearty dish or some tasty dessert to thank someone for fixing your fence.
Sewing and crocheting: These ain’t only for your gramma and her pals. Many folks will need clothes and blankets, which you can sew for them in exchange for a few bottles of milk.
Fishing: You can help the family across the street catch a huge sea bass for their dinner while they give you fresh eggs from their chickens.
Woodworking: If the house belonging to the elderly lady next door got damaged after a flood devastated the community, so you use your skills to help her rebuild it. Meanwhile, she compensates you by babysitting your kids.
Don’t Forget These, Too!
Your safety should always be your first priority, even if you’ve been hankering for fresh omelets. Keep these in mind:
Don’t do business with folks you know nothing about.
Do the exchange in a public space.
Don’t go alone.
Make sure no one follows you back home.
Don’t let anyone discover that you have a stockpile.
Also, not to be Captain Obvious, but don’t ever trade things that you’re running out of or will need yourself.
Final Thoughts
When SHTF, credit cards will be nothing more than pieces of plastic—and even cash will be useless.
You may have squirreled away enough supplies to keep your entire family alive, but you can never be too confident. To be safe, you’ll know how to barter.
So set aside some barter items to trade, keep brushing up on your survival skills, and remember to keep things fair.
I want to present you one of the most interesting sites, where you will see new articles daily! www.321gold.com
“This article was created for educational purposes”
Predicting outright state collapse is inherently uncertain, but by 2040 several countries face materially elevated risk of severe state failure or collapse of central authority—meaning loss of effective governance over significant territory, large-scale internal conflict, or fragmentation. The following list identifies countries widely judged vulnerable by analysts, with the dominant factors driving risk for each. This is a probabilistic assessment (not a deterministic forecast); risks arise from combinations of governance failure, economic stress, demography, external interference, and climate and resource shocks.
High-risk (elevated probability of major failure or fragmentation by 2040)
Sudan
Key drivers: persistent civil war since 2023 between military and multiple paramilitary factions; fractured elites; collapsed economy; humanitarian catastrophe; regional proxy interventions; armed militias controlling territory. Absent a credible peace process and restoration of basic services, continued fragmentation and local warlord rule remain likely.
Libya
Key drivers: enduring rival governments and militias since 2011; localized war economies centered on oil; weak institutions; foreign military involvement from regional powers; fragmented security forces. Elections and stabilization have repeatedly failed; continuation of de facto partition or recurring armed confrontations is plausible.
Somalia
Key drivers: decades of weak central institutions; resilient Islamist insurgency (al-Shabaab); clan fragmentation; recurring drought and food crises; limited revenue base and heavy external dependence. Federal government holds territory intermittently; risk centers on further territorial losses to non-state actors and de facto regional autonomy.
Yemen
Key drivers: prolonged civil war (Houthi vs. internationally recognized government and southern movements), foreign intervention (Saudi/UAE, Iran-backed dynamics), collapsed public services, famine risk, and multiple competing authorities in north and south. A negotiated nationwide settlement before 2040 is possible but not assured; continued partition or frozen conflict is likely without major shifts.
Significant-concern (substantial vulnerability, where collapse is a realistic tail outcome under adverse shocks)
Democratic Republic of Congo (DRC)
Key drivers: vast territory with weak state reach, numerous armed groups in the east, fragile institutions, resource-driven local conflicts, poor infrastructure, and refugee flows. A regional conflagration or intensified localized state retreat could yield large-scale governance collapse in parts of the country.
Haiti
Key drivers: chronic political instability, powerful gangs controlling large urban areas (Port-au-Prince), weak security forces, economic collapse, natural disasters, and limited institutional capacity. Without decisive security reform and economic stabilization, de facto governance vacuums and quasi-failed-state dynamics will likely persist or worsen.
Afghanistan
Key drivers: the Taliban’s hold since 2021 has not produced unified, durable governance across ethnic lines; economic collapse, international isolation, insurgent pockets, factionalism, and climate-driven shocks. The risk is not classic internationalized collapse but fragmentation, governance breakdown in provinces, and potential return of competing armed groups.
South Sudan
Key drivers: weak institutions since independence, ethnicized politics, recurrent violence, dependence on oil revenues, poor service delivery, and climate stress on pastoralist livelihoods. Recurrent localized breakdowns remain likely; a full reversion to widespread civil war is a significant tail risk.
Medium-concern (fragility that could tip under severe economic, political, or climate shocks)
Lebanon
Key drivers: economic meltdown, currency collapse, sectarian/political paralysis, refugee burden, and state delegitimization. Collapse into prolonged governance paralysis and localized militias is possible if economic conditions and patronage networks deteriorate further.
Pakistan
Key drivers: economic crisis, political-military friction, extremist insurgency pockets, water scarcity, and institutional fragility. Full state collapse is low-probability, but severe governance crises, localized breakdowns, or loss of state capacity in border regions could occur under large shocks.
Nigeria
Key drivers: insurgency in the northeast (Boko Haram/IS affiliate), banditry and farmer–herder conflict in the middle belt, separatist pressures in the southeast, weak logistics and constrained fiscal space. Collapse of the whole state is unlikely, but protracted fragmentation or long-term erosion of state authority in large regions is a material risk.
Cross-cutting systemic factors that increase collapse risk
Weak political institutions and elite fragmentation: personalized rule, lack of legitimate inter-group power-sharing, or competing centers of power increase likelihood of violence and devolution of authority.
Economic collapse and fiscal insolvency: hyperinflation, loss of export revenue (commodity shocks), unsustainable debt, and inability to pay security forces degrade state capacity rapidly.
Prolonged armed conflict and proliferation of non-state armed actors: when militias, insurgents, or criminal gangs control territory and revenue streams, central authority becomes nominal.
External interference and proxy wars: foreign militaries, weapons flows, and proxy backers extend and complicate domestic conflicts, preventing settlement.
Climate change and resource stress: droughts, floods, crop failures, and water scarcity exacerbate displacement, food insecurity, and competition over land.
Demographic pressures and youth unemployment: large cohorts of unemployed young people create recruitment pools for armed groups and increase social volatility.
Humanitarian crises and displacement: mass refugee movements and internal displacement overload state and regional systems, eroding legitimacy and control.
How to interpret this assessment
Collapse is not binary; states often move into zones of partial failure where central control coexists with autonomous regions, militia rule, or competing authorities. The list above highlights countries where such severe deterioration is plausible by 2040 if current trajectories persist or if adverse shocks occur.
Time horizons and probabilities matter: some countries face near-term high risk (next few years), others face chronic fragility that could tip under repeated or large shocks before 2040.
External and internal policy choices matter: international mediation, targeted economic support, inclusive political settlements, and climate adaptation can materially change trajectories.
Indicators to watch through 2040 (early warning)
Sharp collapse in government revenue and public-sector payrolls (security forces unpaid).
Loss of monopoly on violence in large population centers or resource-producing regions.
Rapid increases in internally displaced people and refugee flows across borders.
Significant foreign military bases, covert arms flows, or open proxy deployments.
Breakdown in basic services (electricity, health, food distribution) for sustained periods.
Sources and limits
This assessment synthesizes patterns observed in conflict studies, fragile-states indices, UN humanitarian reporting, and regional expert analyses through May 2024. New diplomatic settlements, reform breakthroughs, or large-scale international interventions could alter trajectories before 2040.
If you have any dissatisfaction with my content, you can tell me here and I will fix the problem, because I care about every reader and even more so about your opinion!
I want to present you one of the most interesting sites, where you will see new articles daily! www.321gold.com
Planning for prolonged food shortages requires shifting from emergency thinking to resilient systems: diversify food sources, secure storage and production capacity, and build skills and community networks. The following actionable strategies cover immediate preparedness, medium-term resilience, and long-term self-reliance.
Mindset and priorities – Prioritize nutritional density and calories: focus on a mix of storable staples (calories) and nutrient-rich items (protein, fat, vitamins). – Resilience > perfection: redundancy across food, water, fuel, skills, and social support is more important than having one “perfect” supply. – Security and locality: plan based on realistic local risks (climate, supply lines, social stability).
Short-term food stockpiling (3–12 months) – Staples to store:
Grains: rice, wheat, rolled oats, cornmeal.
Legumes: dried beans, lentils, peas.
Fats: vegetable oil, ghee, coconut oil.
Sugar/honey, powdered milk, canned meats/fish, canned vegetables and fruits.
Salt, baking soda/powder, vinegar, yeast.
Storage best practices:
Use oxygen- and moisture-proof containers (Mylar bags + oxygen absorbers, food-grade buckets with gamma-seal lids).
Store in cool, dark, dry places; rotate stock using FIFO (first in, first out).
Perennial and low-maintenance foods: fruit trees, berry bushes, asparagus, rhubarb.
Seed saving: keep open-pollinated/non-hybrid seeds; store properly (cool, dry, dark).
Protein sources:
Poultry (chickens for eggs/meat) — small flock yields quick returns.
Rabbits — efficient meat producers for small spaces.
Fishponds or aquaponics where feasible.
Foraging and wild edibles—learn local species, seasons, and safe preparation.
Soil and fertility:
Composting (hot composting to kill pathogens), vermiculture (worm bins), green manures and cover crops.
Learn and practice crop rotation to reduce pests/diseases.
Water resilience:
Rainwater harvesting (legalities permitting), storage tanks, drip irrigation for efficiency.
Greywater reuse systems for irrigation where allowed.
Skills and tools – Food-prep and preservation skills: pressure canning, fermenting (sauerkraut, kimchi), lacto-fermentation, smoking, curing, drying. – Basic animal husbandry: coop design, feeding, health checks, slaughtering and butchering. – Gardening skills: seed starting, soil testing, grafting, pest management without synthetic chemicals. – Mechanical and energy skills: basic carpentry, small engine repair, solar panel installation, alternative cooking methods (rocket stove, efficient woodstove). – Medical and food-safety knowledge: wound care, dehydration treatment, safe water handling, canning safety.
Community and barter systems – Build local networks: neighborhood food-shares, tool libraries, skill exchanges, cooperative gardens. – Establish trustworthy barter items: preserved food, fuel, seeds, tools, medicines, batteries, skills (mechanic, carpenter, midwife). – Organize communal storage and production to pool labor and risk (community-rooted resilience is more robust than isolated stockpiles).
Security and risk reduction – Keep a low profile for stored supplies: avoid advertising holdings, use dispersal (divide stocks among trusted locations). – Diversify food sources across home, community, and possibly rental garden plots to reduce single-point failures. – Maintain basic defensive awareness and conflict-avoidance plans; avoid unnecessary escalation.
Financial and practical preparations – Convert some financial reserves into tangible, nonperishable assets: long-term food, seeds, fuel, tools. – Maintain small denominations of cash and barterable items; learn local currencies and informal exchange norms. – Prioritize portability: have a compact 72-hour kit for emergency mobility and a separate longer-term supply.
Psychological and household planning – Establish household roles and an emergency plan: who tends animals, who manages water, who preserves food. – Practice drills for rationing, garden succession planting, and alternative cooking methods to avoid surprises.
Low-cost, high-impact investments – Pressure canner, water filter (ceramic or multi-stage), high-quality seeds, sturdy hand tools, chest freezer with generator backup where electricity is reliable. – Fuel-efficient cookstove or rocket stove, solar oven, or small solar generator for essential power.
If starting from near-zero: practical entry sequence
Build a 1–3 month emergency food and water supply.
Add a small livestock project (backyard chickens).
Expand storage to 6–12 months while growing community ties.
Examples and typical stories
Urban balcony gardener who grew potatoes in containers, kept hens on a rooftop coop, and preserved surplus by fermenting and canning—reduced grocery dependence by ~60% in one season.
Small rural cooperative that pooled rainwater tanks, ran a shared greenhouse and root-cellar, and organized regular seed exchanges—maintained food supply through a local market collapse.
Caveats and legalities
Follow local laws about rainwater collection, livestock in residential zones, and foraging protected areas.
Food safety matters: improperly canned foods can cause botulism; follow tested recipes and procedures.
Outcome goals
Short-term survival: sufficient calories, clean water, and basic medicines for the household.
Medium-term stability: 6–24 months of supplies plus productive garden/animals and preservation capacity.
Long-term resilience: community networks, seed sovereignty, diversified food production and stored reserves enabling multi-year continuity.
Recommended next practical actions (immediate)
Buy a pressure canner or learn where to access one; store 3 months of staples; start a small raised-bed garden and save seeds from first harvests.
I want to present you one of the most interesting sites, where you will see new articles daily! www.321gold.com
WARNING! Watching The Following Video Will Give You Access To Knowledge The Government Does NOT Want You To Know About
Even some of our brightest scientific minds are projecting that there is absolutely no positive future for our civilization if we stay on our current course. Perhaps one of the reasons why our society has become so obsessed with short-term results is because most of us can’t bear to think about the long-term consequences of our actions. I have a website that focuses on “economic collapse”, but it isn’t just the economy that is headed for catastrophe. Virtually every aspect of our society is coming apart at the seams all around us, and the era that we are moving into will be more nightmarish than most people would dare to imagine. But our political leaders continue to insist that everything is going to work out just fine somehow, and most people choose to believe them.
In, an old MIT study from 1972 that projected that our civilization will collapse at some point during the 21st century made headlines on several major news sites…
In 1972, a team of MIT scientists got together to study the risks of civilizational collapse. Their system dynamics model published by the Club of Rome identified impending ‘limits to growth’ (LtG) that meant industrial civilization was on track to collapse sometime within the 21st century, due to overexploitation of planetary resources.
In particular, the study identified a period of time “around 2040” when societal collapse would be very likely…
The study was published in the Yale Journal of Industrial Ecology in November 2020 and is available on the KPMG website. It concludes that the current business-as-usual trajectory of global civilization is heading toward the terminal decline of economic growth within the coming decade—and at worst, could trigger societal collapse by around 2040.
Of course events are not going to transpire exactly as they foresaw, but as far as the big picture is concerned they were right on the money.
Our society is now in the process of collapsing all around us, and you can see evidence of this everywhere that you look.
Last years , civil unrest is causing widespread chaos in the streets in Cuba, South Africa, Beirut and Paris. We have entered a period of time when it seems like people are perpetually angry, and the wild scenes that are playing out around the globe are absolutely shocking.
Meanwhile, we are dealing with the worst epidemic of illegal drugs in our history. If you can believe it, drug overdose deaths were up nearly 30 percent last year…
Drug-overdose deaths in the U.S. surged nearly 30% in the last years, the tragic result of a deadlier supply and the destabilizing effects of the Covid-19 pandemic, according to preliminary federal data and public health officials.
Drug overdose deaths were already at an all-time high coming into 2024.
So for the number of deaths to rise 30 percent above that level in just one year is really, really tragic.
The corporate media should accept responsibility for their role in provoking these attacks.
For years, the corporate media has been relentlessly demonizing conservative Christians, and churches are the most visible symbols of conservative Christian culture in our society.
As the corporate media continues to blame conservative Christians for society’s ills, it is inevitable that there will be more attacks on churches in the future.
But of course there will be more violence everywhere around us as our society continues to steadily unravel.
I have never seen as much anger, frustration and hate as I am seeing right now, and there is no future for a society in which virtually everyone is filled with rage.
The years ahead are going to be extremely chaotic, and I would suggest that you plan accordingly.
So the old adage goes anyway, and for the prepper – the one who’s keeping abreast of current events – cash is one of the last man-made means of protection that he or she has against governments that have grown to a degree of power that they never had before.
The Dangers of a Cashless Society
There are two predominant dangers that come with a cashless society, and just about every negative that you can think of due to such will fall into one of these two groups:
Denial of purchasing power
A complete loss of anonymity
Denial of Purchasing Power
A cashless society is a controlled society. If everything must go through an online banking or credit card process, then you have just lost virtually all control over what you buy.
Anything that is not politically sanctioned(guns, ammo, body armor, helmets, particular books, particular website premium subscriptions, political donations, etc.) could very easily be vaporized overnight.
This, of course, would drive the makers and holders of such products into a black market to barter their goods, and this in turn would be responded to by the use of overwhelming government force. This will come in the form of Stryker vehicles, concussion grenades, snipers, and men with automatic rifles and body armor.
Don’t believe me? Read FA Hayek’s The Road to Serfdom. Totalitarian governments must resort to force simply for the sole reason that people will naturally refuse to comply with widespread theft of their own goods. This force will only continue to grow in its usage.
Totalitarians do not accept blame for their own economical failures. The state is the end of all things to them, and as such, the end justifies the means – no matter how terrifying such a means may be.
A Complete Loss of Anonymity
Once cash is abolished everywhere, your attempts at any form of anonymity will be destroyed.
You already have an amazing amount of data that has been collected from you from your Internet search history, GPS data, voting history, bank statements, credit card statements, phone data, and a host of other publicly available information that easily allows people to deduce information from you.
And where humans fail, algorithms thrive. I have a hobby interest in algorithm creation (particularly multiple linear regression analysis) and have used it within my healthcare job as a means of predicting patient attendance rather accurately on any given day. I’ve also used them to (somewhat less accurately) predict when a patient was going to have episodes of heart block.
Algorithms are a powerful tool, and the more data you feed them, the stronger they get. With the amount of data that has been collected on you already, the government may be able to make a much stronger prediction about who you are, what you believe, and what you possess than you would’ve ever thought possible.
Just think about what a cashless society would mean for the following purchases:
Medicine – The government can now invade your medical privacy to see what meds you need to live as well as know what could either improve or hamper your condition. For those who don’t believe that this is a concern, just keep in mind that it wasn’t that long ago that the US military was warning its soldiers against getting genetic testing to determine their family tree. Why? Because it was deemed to be a security risk. What do they know here that we don’t?
Food – Algorithms can easily predict when you are buying much more than what you could eat within a particular span of time. This then means that food stores can be predicted and located. Come disaster time, your house could easily be one of the first that is targeted for “hoarding”. And what happens if it’s determined that those with large food stores are likely to be “domestic terrorists”?
Firearms and Body Armor – This is the low-hanging fruit here. Weapons, ammunition, body armor – they could all be easily tracked (and later confiscated). Buying “too much” of one particular product may cause red flags to be attached to your file, and you could very easily end up with a visit from an alphabet agency full of men carrying what is now a felony for you to own.
Ham Radios – There already seems to be an attack against ham radio users as the government has realized that this is the route that many fearing censorship/silencing are turning toward. If you can shut down all communication other than what is government sanctioned, you have effectively silenced free speech.
Media – Do you like to watch documentaries that may be labeled as conspiracy theories? Is it that hard to imagine a “misinformation tax” to discourage Americans from imbibing in certain forms of media? Why not? We’ve already seen the “death by a thousand cuts” approach being used with firearms so that the argument can be made that “no, you can have a gun, but you just have to fill out these fifty forms, pay a $4000 fee, and have a license. See? There’s no infringement whatsoever.”
To think that the same idea couldn’t be applied to the news commentators that you like to listen to is naive.
Here are some arguments that will be used for a cashless society:
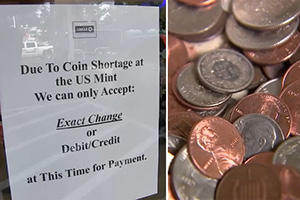
Physical Money Shortages
Throughout 2020 we were told that there was a coin shortage throughout the U.S.
As a result, retailers either quit giving coin change back or strongly discouraged customers from asking for it.
Kroger actually resorted to either giving you back your money in the form of credit vouchers (to that particular store of course) or by donating the change that they owed you to charity.
Control Over Dangerous and Illegal Purchases
In what can only be viewed as an incredibly ironic wordsmithing, we will be told that one of the benefits to a cashless society is that we can finally rein in purchases that are deemed by the government to be dangerous to the public.
Guns, ammunition, freedom-oriented books (“radical terrorist recruiting material”), and the like will be argued against so that we can keep our society safe. Notice that there is always an emphasis on safety throughout this entire process.
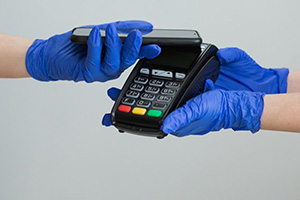
A Fomite of Disease
Once again, 2020 set the stage here. Cash purchases plummeted worldwide, with credit cards filling in the void as people began to avoid any and all cash purchases with the hopes of not getting themselves sick.
This was a talking point spouted throughout the mainstream media in 2020 and will continue to be used in the future as the push for the abolition of cash continues.
Cost of Creation Outweighs the Actual Value of Money
We see this already with the US penny. It actually costs 2.41₵ to produce a single penny.
While our government currently has no problem with making fiscally irresponsible decisions, when it finally does come around to deciding that “you know what, pennies aren’t worth it” – or any other form of cash for that matter – there will be nobody that will argue against them.
This decision will be portrayed as a means of reducing wasteful spending, and anyone who argues against this given reasoning for the abolition of cash will be labeled as an idiot who can’t do proper math.
Less Risk of Theft
We don’t often hear this argument being made currently, but it is out there.
The argument goes that if you’re mugged while you’re carrying $300 in cash, you simply lose all of your money.
However, if you’re mugged and all you have on you is your credit card, then you can quickly call the credit card company, cancel your card, and be reimbursed for any disputed charges that were made in the interim.
What Can We Do to Fight This Process?
While I do believe that a cashless society is inevitable, I do think that there are things we can do to fight against it and to slow it down.
Here is what we can do as freedom and privacy-loving Americans.
#1. You Need to Make Friends with Like-Minded People Now
I used to always blow off this idea. It wasn’t until I began talking with Forest of Prepper Net that I began to see the light on this issue. If you don’t have like-minded friends, you’re going to be up a creek without a paddle when a cashless society hits.
You need to know who has what skills, who has what goods, who can get what, and where their sympathies lie. Perhaps this is more of a cashless society survival skill, but nevertheless, refusal to comply is still a means of fighting against a cashless society.
And this isn’t just refusal to comply based on principal. This is refusal to comply because to do otherwise would mean certain death. When you’re not allowed into a store to buy food and other necessary goods for your family because you refuse to use Fedcoins for purchase or refuse to show a vaccination card you better be dang sure that you have some alternate means of getting what you need to live.
History has proven such. Read the diary of Anne Frank. Had Otto Frank (her father) not had connections with like-minded (this is key) people throughout his neighborhood well prior to his going into hiding with his family, they would’ve died well before the Nazis came and took them away.
Listen to what Good Patriot out of Texas has to say in her Fighting Back videos on Telegram. She’s echoing this same thought process. You need to make groupings of people who can work together to combat this evil.
#2. Develop Some Means of Production
Both Ayn Rand and Adam Smith harped on the fact that production is what equals true wealth. Whether it’s learning how to raise livestock, how to work with leather, how to tan hides, you need to learn some means of production so that you can still produce wealth when cash is taken from you.
You still have to eat. You still have to put bread on the table. And there are going to be others out there who have principles and love logic who will be of the same mind as you. They are going to want to trade for supplies. Barter will come back in full force. You’ll need to have some means of producing something of value so that you can get what you need.
#3. Invest in Precious Metals
Robert Kiyosaki harps upon this in his new book, Fake, the reason being, that precious metals have intrinsic value. They’ve been used as a form of money for roughly 6,000 years now, and they’re not going to stop being a store of value anytime soon. Within a barter society, this may be one of your best stores of wealth.
On top of this, over 40% of the US dollar supply has been printed within the past year alone. Every other economist you see is screaming about the signs of inflation. The U.S. dollar is about to collapse. There is no longer any denying it. Inflation has already risen drastically and will only continue to grow worse. You need to begin doing something to protect your wealth from inflation.
Precious metals are part of the solution.
#4. Start Using Masked Payments
If you don’t have one already, you need to set up a Privacy.com account. This is a form of masked debit card that will help to keep your purchases anonymous. Yes, this is a form of cashless payment, but it is still a way to fight against such a monster.
Provided that money is flowing out of your account but nobody can tell who you just bought from or what you bought, you’ll be much safer in your transaction privacy.
#5. Refuse to Cater to Businesses that Don’t Permit Cash Transactions
If you tug on their purse strings, they eventually change their mind. I’m sorry, but when good compromises with evil, evil wins. Do what you can to avoid these businesses like the plague, and then let them know why you’re avoiding them.
I used to carry around business cards detailing why I wouldn’t support businesses with ‘’no gun’’ stickers on the front doors. I’ve since ran out. I think that such a business card for businesses that don’t permit cash transactions would be an easy way to voice one’s displeasure as well.
Here’s a sample card template:
“I consider your refusal to accept cash as un-American, a forced invasion of my privacy, and a totalitarian tool. As such, I will cease from doing any business with you for the near future and will be spending my money at your competitors instead.”
This is similar to the language that I used within my Second Amendment business cards. I bought them easily off of Vistaprint (around 500 for $20 or so) and considered the money worth every penny.
#6. Learn How to Grow Your Own Food
There’s already a movement afoot within the U.S. to keep certain types of people out of grocery stores. Vaccination papers are beginning to be asked for before one gains access to certain venues or hotel chains. It won’t be long until cashless payments are the only means of accessing even groceries.
Because of this, I highly recommend that you learn how to grow most of your own food, and begin learning now. Gardening has quite a learning curve and is nowhere near as easy as Michael Bloomberg would have you believe. You need to ensure that your family can eat, and gardening is a great part of that process.
Final Thoughts
A cashless society truly is a scary world. Picture everything that you’ve read about in history books within other totalitarian regimes, and you’ll get a taste of what is to come. I implore you to do something now to protect yourself against the rolling stone that is coming down the mountain right for you.
If you follow the above advice, you’ll help to ease the blow. And there’s no doubt about it – it will be a smack in the face. But we can’t just sit back and do nothing as privacy dies a quiet death inside what was once the freest nation on Earth.
If you’ve found other ways to combat a cashless society that we did not cover within this article, by all means, please let us and others know within the comments. This is about helping our fellow man, and as much input is needed as possible.
First take a look at one of the most shocking videos in the world! This video actually shows us what the secret of the Trump family is related to their expressive health!!! –FULL VIDEO HERE
Aside from economic collapse scenarios, many countries are in the process of eliminating physical cash and coins. Instead, everyone has an account that holds their money. You cannot purchase goods or services without access to government-based cryptocurrency. Even if the currency itself is still backed by faith in the government, you have to use this electronic system.
The result is multiple problems that could leave you in a situation where you have the money in the bank to pay your bills and purchase goods and services, yet you cannot do so.
These hacks usually affect the bank or primary clearinghouse rather than a specific person’s account. You may be unable to purchase goods or services for hours or days. While this is inconvenient, it isn’t as bad as a full collapse, where the banks close for good.
There’s only so much you can do about this kind of hack other than make sure you can go two weeks without buying anything at any given time. It is also essential to keep a paper-based address book with phone numbers and account information so that you can contact utility companies or others who may be expecting payments from you while the bank or clearinghouse is down.
Let’s say you can connect to Wi-Fi independently of the SIM Card. Your phone app may not work with Wi-Fi. This is why I recommend having an app on your phone that doesn’t use the SIM card to dial out on Wi-Fi so that you can make the necessary calls.
Attacks Sponsored by Non-government Groups
If the hacker was able to steal money from your accounts, it could take weeks to years before you recover the money. In the short term, you will have to shut down credit cards and so on, then wait for new ones to come in the mail. You may also have to manage restoring devices and regaining access to your accounts.
Here again, make sure you can go at least 2 weeks without buying anything so that you can manage your basic necessities.
Merchant Category Codes and Social Credit Scores
Merchant Category Codes are unique identifiers that put different products into separate categories. For example, food has one set of numeric identifiers, while clothing has other identifiers.
Even without looking at your receipt, the bank and transaction clearinghouse may have some ideas about what you bought. The transaction cost can then give some estimates about quantity and item type. One day, data from all banks and clearinghouses may pool into a central government computer.
Social credit scores work like your financial-based credit scores. Consider how your financial credit score enables businesses to “reward” you with credit or better interest rates if you pay your bills on time and have an optimal debt-to-income ratio. Your social credit score looks at how you act in society. For example, China has a system that rewards things like donating blood.
This same system “punishes” people who drive drunk or engage in other activities that aren’t “beneficial to society.” People with good social credit scores may get tax breaks, an increased chance of getting a promotion, or other benefits.
When vaccines became available for COVID-19, governments worldwide were concerned because people hesitated to embrace mRNA vaccines. This led to people not complying with recommendations to get vaccinated. Social credit scores can be paired with cashless systems that will block purchasing from specific merchant category codes. It could become possible to deny people the ability to buy food, gas, and other essentials if they aren’t vaccinated.
When you can’t use cash, pressure campaigns like this will be almost 100% effective because you will have to comply or do without the necessities of life.
The only way to outlast a pressure campaign like this is to have a stockpile of food and other essentials that will last until the pressure tactics are stopped.
Moving Away From Hard Cash to Fiat Cryptocurrency
At first, you might think merchant credit codes will only come into play when the government seeks to limit, slow down, or prevent purchasing certain goods and services. The problem is that modern networks aren’t safe from hackers, including those who seek to disrupt trade for ethical reasons.
For example, the Internet Archive was recently targeted by a hacktivist group, Blackmeta. They claim they attacked this non-profit library site because it is based in the USA and, therefore, is aligned with Israeli activities. Ironically, the Internet Archive has been locked in multiple court battles with publishers that may be far more aligned with Israel. These publishers, in turn, are trying to shut down the Internet Archive because when people don’t buy from the publisher, it cuts into their profits.
Now imagine this kind of situation happening with the information stolen from the Heritage Foundation, and then used to target more granular data in banks and merchant clearinghouse systems. You could very easily see transactions declined for what appears to be “government” or other legislative curbs, when in fact, it’s some group attacking you because of a “social credit score” known only to them.
If you want to buy something right now, you can just put your credit card away and use cash. This won’t be possible once the only fiat currency available is electronic in nature. No matter how much you want to look at the potential for excess government imposition, the fact remains any group with sufficient skills and interest can cause serious problems.
AI-Based Curbing Impositions
AI can keep track of billions of records and patterns of activity. This includes determining if what you buy is “normal” for your location as well as for you as a consumer within a particular category.
Right now, that’s likely beyond the implementation of the cashless centralized government cryptocurrency systems.
At some point, though, someone on something like the “no-fly list,” etc., could wind up unable to buy certain items or in certain quantities and not realize there is a curb based on a government-based list. Considering how many lists there are, it may be difficult, if not impossible, to resolve the problem and purchase goods in a timely manner.
This includes lists that may be compiled based on estimated political slant. Consider that even now, traffic cameras can match license plates with bumper stickers and yard political signs to determine your likely preferences.
When you factor in non-governmental groups, the situation gets even worse. Technologically speaking, it’s within the scope of foreign agents and hacktivists to bring together limits on how you spend your money and non-financial activities.
As we are seeing in various hacks, there is certainly a “social credit score” being applied to businesses that can be scaled to target individuals who may want to purchase extra supplies to manage an emergency.
Use Multiple Banks to Store Your Money
Right now you can protect your money while it is still in your control. First, it is very important to keep your money in different banks. Even if one goes down, the others may still be functioning.
This applies to credit and debit cards. If you have only Visa cards, ensure you have at least one Mastercard. You can do this with prepaid cards as well as more permanent accounts.
This method won’t work if every transaction must go through a centralized clearinghouse that includes every possible bank or other institution. At this point, it’s impossible to say whether that kind of system exists and how various groups would use or misuse it.
Second, if you routinely buy from certain stores, you can purchase gift cards and have the money ready and waiting in your account. If you cannot access your bank account, you can still buy from that store. This won’t necessarily prevent you from running into rationing or other limits that may be imposed by the government through the store or at the store level.
Bartering: An Alternative to Using Fiat and Non-Government Currency
Preparing for small—and large-scale disasters is essential for your well-being and that of your family. You can still use bartering, provided you have a clear sense of the value of what you will offer and whether or not the other party needs what you have.
Make consistent contacts with small or local farmers and others who may be willing to take something in exchange for food. The trade could be anything from assisting with mechanical repairs to making garments. Everything will depend on the relationship you develop and the situation.
You can make barter arrangements for just about anything from tangible goods to training in various skills. Look for small businesses and local groups, as they may be more open to these kinds of arrangements. Spending a few dollars extra and supporting these people now may be very useful later on.
This is also a good time to form relationships with established flea markets and others with different kinds of products. These people may be very helpful when you find a way to barter for tools or other goods that you can no longer purchase using money. Here again, you have to know what their needs are and how you can meet them.
As hacks on banks, hospitals, water purification plants, and the government itself become more common, it should be obvious that a cashless society can pose significant risks if you aren’t prepared. Taking a few simple measures now may help you get through these situations as painlessly as possible.
According to- discoveryalert.com.au: The push for a cashless society represents more than just technological evolution—it’s a coordinated effort occurring at multiple levels of government, financial institutions, and corporations worldwide. This transition is reshaping how we interact with money and raising significant questions about financial freedom and privacy.
The cashless society is a necessary step in preparation for the mark of the beast.
The mark of the beast, btw, is a concept based on a couple of short passages from The Revelation (end of chapter 13 and start of chapter 14), which say that there will eventually be a one world government just before Jesus returns, and the spiritual leader of that government will cause people everywhere to get a mark put in their right hand or in their forehead, without which they will not be able to buy or sell.
What we have used for centuries for buying and selling is cash (or checks). We have also progressed to credit cards.
So all of these would need to be replaced with the mark, in order for the prophecy to come true.
Is cashless society in World a bad step?
Cashless Means Automatic
If money is easy to spend, it is also easy to take. Convenience can easily become tyranny. Automatic payments that come directly from your bank account illustrate the point.)
Below Is First 9 Major Risks of a Cashless Society:
1.Risk of Confiscation
The convenience of digital money that allows you to spend your money more easily, also makes it easier for banks, governments and thieves to take it.The message to depositors is clear- when you put money in a bank you are a creditor of the bank and if it goes bust you are at the bottom of the list of creditors. Your money** will be seized as part of any approved plan, perhaps even before the broke bank files for bankruptcy.
Your bank account can be raided by government authorities, like the Internal Revenue Service (IRS) without notice or reason given. If the IRS believes your bank account deposit and/or withdrawals activity is suspicious and/or may involve a pattern designed to avoid reporting requirements, they may seize your account.
Think your money is safe in the bank? Think again.
2. Risk of Theft
Digital cash a bit of Trap-it can be stolen.Think digital money is safer than cash and can’t be stolen?
3.Crime is Easier
Some actually believe that in a cashless society that crime will go down and drug dealers will go out of business. Think again.
In a cashless society, theft will occur on line and in far larger amounts than cash heists. An online thief never has to confront his victim, commit violence, crack a safe, get past an alarm system, dog or armed guards and carry away his loot. Rather, in a cashless society, the cyber thief merely has to hack the systems where the ‘money” is. The online heist involves no risk of death or threat to the thief’s personal safety and can be done from anywhere in the world.
4. Risk of System Failure
Without cash, the value of currency would have no independent value outside a functioning banking system to which you have access. Your money wouldn ‘work’ without a functioning banking system. If the banking system is down due to a power outage, solar flare, financial crisis, Internet failure, hack or network crash, your money is unavailable and potentially lost. If back up files are lost how do you prove you had $15,000 in your account?
5. Risk of Being Exiled From the System
Even if the digital banking system was 100% fool proof, you may end up being shut out of the system for wrong doing (actual or alleged), bad credit or failure to pay banking fees. Or you may be the victim of identity theft and as a “precaution” your account may be closed. Without access to the banking system, how will you pay your bills and buy items you need?
6. Results in a Loss of Freedom
While going cashless may be convenient when you choose to buy something, but if a purchase is thrust officiously upon you by government order, your money can be removed from your account to pay for it, conveniently of course. This type of forced convenience results in a removal of freedom of choice of how you may wish to spend your money.
7. Loss of property rights
Property rights are the foundation of a free society. If you don’t have control, ready access or the ability to spend your money when and as you please, you do not really own it.Rather, you are a co-owner with the currency issuer (the bank) who has veto rights over your use of the currency.
8. Loss of Privacy
In a cashless society there is the loss of privacy. Digital money offers the convenience of allowing you to track and budget your money online. Such a system, however, also leaves a permanent digital foot print of where you spent your money, accesible to just about anyone who has access to your account. (crimminal hackers and government agencies). A common objection to this privacy invasion is that “If you have nothing to hide you have nothing to worry about”.
9. Loss of Understanding Value & Responsiblity
Without cash, consumers are no longer market participants that evaluate tangible value based on how much cash they have in their wallets, but mindless spenders without a sense of the value of the items they are purchasing or a sense of understanding of their actual cost after incurring bank and credit card interest fees. (still sky high even after years of zero interest rate policies across the globe).
In a society that uses cash, acts like making change and giving tips provide market participants with a tangible sense of economic value. Children that grow up saving money in piggy banks and counting their pennies, nickels and dimes learn the value of money through the tactil experience of handling money.
A cashless society turns money and value into digital abstractions as defined and controlled by the banks and central planners.
I want to present you one of the most interesting sites, where you will see new articles daily! www.321gold.com
First take a look at one of the most shocking videos in the world! This video actually shows us what the secret of the Trump family is related to their expressive health!!! –FULL VIDEO HERE
Hiroshima. Chernobyl. Nagasaki. Fukushima. They’re practically household names at this point. As such, most people know that the consequences of the radioactive fallout spread far beyond the borders of these towns and cities. What you may not realize, however, is just how far.
In some cases, the consequences might seem trivial. Take, for example, the lack of salad greens throughout France for months following the Chernobyl disaster.
Meanwhile, the black rain following the atomic blasts at Hiroshima and Nagasaki, were clearly devastating.
In this regard, radioactive fallout can be elusive—taking a ruinous toll on some, while others are left seemingly untouched.
Either way, the most important point to remember is that fallout is the inevitable result of practically any major nuclear event. It doesn’t matter whether you’re talking about a meltdown at one of the world’s 450 active nuclear facilities, a terrorist attack with a dirty bomb, or full-scale nuclear war: fallout will be a fact of life for anyone in the surrounding area.
The silver lining? Radioactive fallout isn’t nearly as instantaneous, destructive, and unpredictable as a nuclear blast or meltdown. Indeed, it is something that you can prepare for—something you can work around and navigate your way through.
So in this post, we’re going to take a deeper look at the nature of nuclear fallout and delve a bit deep into the chances of surviving a nuclear attack.
This means we’re going to look at the science behind it, the basics of how fallout works, the situations that can arise, and the challenges you may face in the event of a nuclear disaster.
We will also pay close attention to prevailing wind patterns and geography, allowing us to gauge how much radioactive fallout you would potentially be exposed to during a nuclear attack or disaster.
Table of Contents
01Understanding Fallout and its Effects
02How to Survive the First 72 Hours After an Attack
03Time after Nuclear Attack
04Having a Safe Distance
05Shield from Radiation
06Decay from Nuclear Explosion
07Seek Shelter Indoors and Stay Inside, Away from Windows
08Remain Calm in the Event of a Nuclear Disaster or Radiation Emergencies
09Prepare for the Worst
010Knowledge is Power
011Frequently Asked Questions
And perhaps most importantly, we’re going to touch on a few basic things that you can easily do in order to prepare for—and ultimately survive—short-term exposure to nuclear fallout as you make your way to safety.
For the roughly 100 million Americans living within the fallout zone of an active nuclear reactor, this could be an important read.
So let’s get started…
Understanding Fallout and its Effects
As the name clearly implies, the definition of nuclear fallout is any residual radioactive material that falls out of the sky in the aftermath of a nuclear blast, meltdown or other critical event. If that sounds like common sense, it’s because it is.
What few people appreciate, however, is the true magnitude of nuclear events—or the massive amounts of toxic fallout they can produce. After all, there are a few key things that nuclear bombs and meltdowns both do exceptionally well:
Pulverizing
Pulverizing matter over a wide area, nuclear events can create a tremendous amount of debris, ash, and particulates. These rapidly increase exposure for those in the immediate area—where the highest concentrations of fallout and radiation can be found. In a subterranean explosion, called a “base surge,” this phenomenon is even more pronounced—with an effect akin to that of an active volcano.
Irradiating
Nuclear events irradiate this pulverized material, creating an unintentional but extremely toxic concentration of debris, dust, ash, and fallout—all while local residents are most likely seeking medical attention or escape.
Propelling
Finally, nuclear events propel the radioactive material into the stratosphere. In fact, in some cases, nuclear events can contaminate entire wind patterns with high concentrations of irradiated fallout. That’s how these events have lasting—albeit milder—effects hundreds or thousands of miles away.
These forces work together to produce a synergistic effect that maximizes victims’ exposure to toxic elements. Ergo, even and especially those who survive the initial blast can expect to face an absolute nightmare situation in terms of exposure to radiation.
When it comes to determining the extent and volume of fallout following any particular nuclear event, there are two key factors to consider.
First, there’s the location of the explosion. If it’s an airburst, then comparatively little fallout will be produced (but there will be a substantial EMP wave). However, if it’s a surface explosion, material will actually be pulled up into the nuclear cloud and irradiated before it’s carried along the plume into the upper atmosphere.
Consequently, you might think an explosion over water would be more favorable—but that’s just not the case.
You see, the explosion evaporates water and irradiates the remaining sea salt, producing much finer and smaller radioactive particles that can spread across a much larger area. This fallout can then seed clouds and rain back down on cities hundreds or even thousands of miles away.
And it goes without saying that this fallout won’t simply wash off the outside of a building. Indeed, water surface bursts can even pulverize the sea floor. During the infamous Castle Bravo nuclear test, for instance, where a massive chain reaction was accidentally triggered due to the bomb’s peculiar construction, it was reported that calcinated white powder (pulverized coral) rained down on nearby boats.
Subsurface bursts, meanwhile, become even more complicated, because the base surge they produce can flood the surrounding areas with lethal doses of radiation before the fallout even arrives.
The second key factor is meteorological. Though it’s frightening to think that something as devastating as nuclear fallout is determined by the way the wind blows, that, we’re afraid, is exactly the case. This means that, due to the fine particulates produced by a nuclear blast, fallout can easily be carried over hundreds of miles in a matter of hours and days.
Of course, the greatest intensity of the fallout is felt in the immediate area of the nuclear event, but radioactive materials can nevertheless spread far and wide due to its volatile nature.
Part of this is accomplished through the animal kingdom. For livestock who graze in fields covered in nuclear fallout, for instance, their radioactive diet might prompt their extermination (as in Chernobyl). In other instances, however, they may spread the fallout further by carrying it in their fur, droppings, and bodies.
Vegetation is a concern here, too. After all, crops can be dusted with fallout from an explosion hundreds of miles away, as was the case with the French salad greens mentioned above. These plants typically have to be safely destroyed to contain exposure.
But ultimately, the nature of exposure, how it works, and what constitutes a lethal dose of radiation—these things are still widely debated and little understood. But, when it comes to fallout, there are a few things that can be said for certain:
Fallout isn’t always predictable, it’s got devastating potential, and knowing what to expect can provide a crucial advantage at a time when most people will still be reeling.
How to Survive the First 72 Hours After an Attack
Facing the reality of a nuclear detonation (and the fallout that comes with it) might feel overwhelming to think about. With that said, it’s far from being a hopeless scenario.
Consider Akiko Takakura, for example, who was just 300 meters from ground zero at the Hiroshima explosion but survived unscathed. Eizo Nomura, meanwhile, was even closer, at just 155 meters from the hypocenter. That means he stood less than two football fields from a nuclear explosion and still lived well into his eighties.
This, of course, raises the question: how did they survive a nuclear bomb going off right on top of them while so many others perished? In reality, there are four key factors that will determine whether you’re safe from the fallout of a nuclear detonation or meltdown:
Time after Nuclear Attack
As we’ll cover in just a moment, time is crucial after a nuclear blast. You’ll only have about fifteen minutes to seek sufficient cover, but radiation will die down to acceptable levels in most of the blast area after just a few days. Note that fallout is at its absolute worst in the first 72 hours, so it’s crucial to evacuate immediately or stay sheltered. After a few weeks, you’ll be able to make longer trips outside (if you haven’t yet evacuated).
Having a Safe Distance
While there are a handful of cases like those mentioned above, close proximity to a nuclear blast and the immediate fallout tend to spell certain disaster. So while it makes sense to shelter in place during the worst of the fallout, your ultimate goal will be to put a safe distance between you and the bomb’s lingering radioactive effects.
Shield from Radiation
In an instant, the initial fireball and scorching thermal radioactive material of a nuclear detonation gives way to what’s called gamma radiation. Gamma radiation is notoriously powerful, able to penetrate inches of heavy material (even thick lead plating) and rapidly poison the body, so shielding can play a vital role in protecting you from radiation. Notably, both of the Hiroshima survivors mentioned above were underground in a shielded concrete basement, which was the key to their survival.
Decay from Nuclear Explosion
Radioactive materials decay at different rates, which can affect everything from timing and distance to the amount of shielding needed to protect yourself.
Here, it’s worth noting that each of these factors interacts with the others. So if you’ve got a robust enough shelter, you won’t have to worry so much about distance. Likewise if you enter an area weeks after the fallout has dissipated.
In that spirit, let’s take a look at how you might really survive a modern nuclear event.
First things first: if you’re exposed to a nuclear detonation or meltdown, it will be a hard thing to miss. You’ll either see it, hear about it on the news, take note of a special nuclear fallout alarm, or catch on as those around you react to what’s going on.
In the first crucial minutes, your very first priority will be finding the best possible shelter nearby. This is because you’ll have about fifteen minutes or less to do so. Remember that cars provide absolutely no protection, and that any (indoor) shelter is better than being outside.
Once you’ve found the right place, go to the deepest room inside it. You’re basically trying to put as many walls as possible between you and the outside world, even if that means holing up in a linen closet. Note that you’ll want to make sure you’re away from doors, windows, and anything else that might be exposed to the outside world.
It’s even a good idea to tape up the cracks around doors and windows, to prevent particulates from seeping in.
PRO TIP
Remain Calm in the Event of a Nuclear Disaster or Radiation Emergencies
While we want to stress the importance and gravity of the information we’re presenting, we also want to establish some reasons as to why you should remain calm.
First, most modern nuclear weapons have a blast zone of about one mile. For meltdowns, the most severe area of exposure will be even smaller. If you’re outside this small radius, you’ve already dodged the greatest risk of fatality.
After the initial blast, you’ll have about fifteen minutes to seek shelter before the fallout begins to set in. This gives you enough time to find the best possible shelter in the immediate area without exposure.
It might seem ideal to have a hazmat suit and expensive kit on hand at this point, but the best thing is good old-fashioned shelter–namely concrete. Ultimately, that’s the best protection for those first crucial days.
While fallout and the aftermath of a major nuclear detonation will obviously last for years, you should be through the absolute worst of it in just 72 hours.
Once you’re confident in your shelter, you’ll want to gather supplies. We’ll talk more later about which supplies are best to keep on hand (ideally you’ve got a bug-out bag), but you’ll want to lay hands on as much food, water, and other essentials as you can find without leaving your shelter. Once the fallout sets in, it won’t be safe to eat anything (even packaged food) from outside your shelter.
It’s also a good idea to remove your outer layer of clothing, take a shower, if possible, and change clothes, as this ensures that you’re not wearing fallout in your shelter. The same holds true for any pets that were outside—give them a good wash to minimize radiation exposure. After that, waiting is the name of the game.
Note that in the immediate aftermath of a nuclear explosion, radiation levels will typically be extreme, and fallout will be at its worst. This is when you’re most likely to see effects like the black rain that came down on Hiroshima after the nuclear explosion there.
Fortunately, the worst of this fallout will dissipate quickly. In some cases, radiation levels can drop from as much as 1,000 roentgens/hour to as little as 10 roentgens/hour in just the first three days. That’s why it’s so crucial to stay inside, away from windows and doors, during the entire first 72 hours.
This is where a radio can come in handy, giving you a crucial lifeline to the outside world. After all, for the next 72 hours, you’re going to want to stay buried as deep as possible in your shelter while the intensity of radiation outside plummets to more liveable levels.
After that, in many cases it should be safe for short trips outside. Of course, there’s no guarantee, as each nuclear event plays out differently. Regardless, by the 72-hour mark, you can start thinking about making your way to safety or at least assessing your surroundings.
Here, it’s important to stress that even if the nuclear event doesn’t happen in your immediate area—even if it’s hundreds of miles away—the fallout could still potentially reach you in a day or less. So, even if you’re just watching the news or monitoring releases from the Center for Disease Control (CDC) about a nuclear event on television, don’t hesitate to start making preparations.
Prepare for the Worst
To survive nuclear attacks and ensure minimal damage, it will take more than being lucky; you should prepare. When preparing for something like a major nuclear event (and the fallout that comes with it), you run the risk of preparing in a manner that’s either too specific or too broad to be truly helpful. So instead, it’s best to break things down to their components—then focus on doing the best job with each individual component.
For example, it’s generally a great idea to stock up on food and water. This is especially useful in the event of nuclear fallout, because the more food and water you have, the longer you’ll be able to stick to your shelter and avoid the radiation outside. Ideally, you’ll want at least a two week supply of food and water on hand.
If and when that food is depleted, you’ll need an escape plan to get you to safety. If you’re in a city, that might mean making it to the country. Or if you’re on the coast, it might entail driving to a family cabin in the mountains.
Regardless of your exit strategy, it’s important to have one, whilst keeping a few backups in case things don’t go exactly to plan.
MIRA Safety CM-6M CBRN Mask
Since any realistic exit strategy will have you leaving your home after a few days, weeks, or months, it’s prudent to stock up on hazmat gear as well. MIRA Safety’s HAZSUIT, CM-6M mask, and NBC-77 SOF filter all have a long shelf life and can be paired with Kappler chemtape, tough chemical-resistant gloves, and overboots for complete protection.
NBC-77 SOF Canister Filter
While it might be tempting to save a few dollars on your hazmat gear, it’s important to remember that not all suits are created equal. Ultra-cheap suits, for instance, can easily be punctured, exposing you to dangerous elements. Military suits, meanwhile, feature carbon lining and breathable composition, but they can be prohibitively expensive or hard to find (something we’re working on improving). Our HAZSUIT, on the other hand, strikes a nice compromise between the two, with reliable puncture-resistant performance and an appealing price point.
HAZ-Suit Hazmat Protection Suit
It’s also great to keep an emergency package around for storms, blizzards, hurricanes or tornadoes. That kit should include a crank-style emergency radio, basic first aid kit, matches, flashlights, and other basic utilities. Once again, these are all great tools to have on hand in case of nuclear war—especially the radio.
Some folks will even go as far as to prepare a special fallout room/nuclear war shelter, reinforcing walls with wood, concrete, bricks, and sand to thicken barriers and cut down on possible radiation.
While this might seem like overkill, a few minor considerations can actually upgrade an existing storm/hurricane shelter to something that would increase your odds of surviving a nuclear event. Plus, even just a few inches of barrier could provide much needed protection from the gamma radiation mentioned above. In the end, there’s a wealth of knowledge to consult online, and there are plenty of contractors who would be willing to work with you on a custom setup.
Perhaps the most specific preparation for nuclear fallout should be in your bug-out bag. After all, you may be at work, school, or otherwise away from home when a nuclear event occurs—in which case a bug-out bag is a crucial lifeline to get you to safety.
That’s why there are a few must-have items we recommend for everyone’s bug-out bag:
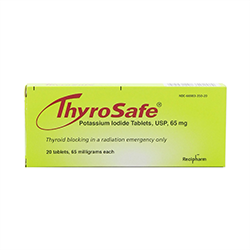
Thyrosafe tablets
Thyrosafe tablets are a cheap and easy purchase—and one of the items most likely to save your life. But how do they work? Well, these powerful pills flood your thyroid with safe iodine, enough to keep your system from absorbing any for the next 24 hours. This is crucial, because radioactive iodine (I-131) is a major factor in nuclear fallout, accumulating in your thyroid and rapidly poisoning the rest your body with radiation. One little pill, however, has the power to stop that process dead in its tracks.
A reliable gas mask
A reliable gas mask, like the MIRA Safety CM-6M or military-grade CM-7M full-face gas mask, is a bug-out bag must-have. Although dangerous radiation can pierce concrete with ease, radioactive particles can still be extremely dangerous, especially in the immediate aftermath of a nuclear explosion. There might also be fires and chemical or biological elements in the environment. While a gas mask is only part of a larger system of personal protective equipment (PPE), it remains a staple, as it’s highly mobile, easy to carry, and can save your life in the right circumstances.
A gas mask filter
To filter out that radioactive iodine, you’ll need a gas mask filter that’s reactor-rated. In this regard, the MIRA Safety NBC-77 SOF filter is a great choice, because it also provides protection against a number of other chemical, biological, and radiological threats while having a twenty-year shelf life and lightweight construction.
An emergency radio
Even if you’ve already got one at home, an emergency radio is well-worth the investment. After all, when hunkering down in a shelter, there’s a good chance that cell phones and standard phone lines will go down, but emergency radio broadcasts will let you know whether it’s safe to go outside. Note that these things cost just a few bucks, they’re compact, and they can be just as much of a lifesaver as the Thyrosafe tablets.
Whatever else fits
Lastly, pack whatever else fits, including a hazmat suit and chemtape for sealing things up. Granted, these inclusions won’t necessarily be practical in most bug-out bags—indeed, it might be a better idea to just double down on your food supplies.
Nonetheless, a hazmat suit and chemtape can be helpful for navigating the environment after you survive the first 72 hours. A gas mask, however, is a definite must-have, because it can be carried with ease and donned in a matter of seconds, while a hazmat suit can take substantially longer to deploy.
Of course, this is all in addition to what you might already have in your standard bug-out bag—but it shouldn’t add too much weight. Note that MIRA Safety even offers a special package that includes a gas mask, filter, Thyrosafe tablets, and a drop-leg pouch to store it all.
Regardless, these key preparations are easy to make—and potentially extremely useful in other situations as well (particularly in relation to the gas mask).
Knowledge is Power
We understand that the prospect of surviving the aftermath of a nuclear event is rather daunting. Hopefully, however, it seems a bit less overwhelming than it did just a few minutes ago.
Make no mistake—it would still almost certainly be the single most challenging day of your life. And a variety of factors will inevitably remain well outside of your control. However, with a bit of careful preparation and consideration, you can vastly increase your own odds of surviving the nightmare of a nuclear explosion and attendant fallout.
Remember: it’s all about those crucial first 72 hours. From the first fifteen minutes to those first three days, simple decisions could have massive consequences for your survival. So find the safest possible shelter, hunker down, and wait out the worst of the radiation.
Granted, even after everything we’ve covered, even after preparation and planning, you’ve still got to be ready in case things go awry. So, what will you do if your primary shelter is suddenly out of the question? What if you don’t have a bug-out bag handy?
Preparing for multiple contingencies with layered plans can further improve your chances of survival and help you adapt to challenges on the fly. Therefore, be sure to identify good shelter locations near the places you spend most of your time, and stock up on backups wherever possible.
If it isn’t already, surviving economic collapse should be at the forefront of your mind. And with good reason; the pitiable state of the economy has sparked fear that the world is to face an even larger economic collapse in the coming year. We are truly in a precarious position. The moment the United States dollar experiences a weakening, and the value of basic commodities like oil, gold, and grain skyrocket, a lot of people will be scared for their own daily survival. But, is there still a way of surviving total economic collapse if this event were to take place? The good news is, the answer is yes. The bad news is, while every one of these tactics are absolutely achievable, most Americans will never take the care to implement them. For this reason most will either suffer terribly, or perish in the wake of this disaster. There are various survival skills, both physically and financially, which you can learn and implement now, in order for you and your family to survive in case there is a total economic meltdown.
Surviving economic collapse is a planners game. One of the simplest, but greatest, ways of surviving economic collapse is to lay a plan out beforehand. List down all your assets and liabilities. How fast will you be able to pay out your debts and at the same time, buy your needed supplies? There should be no debt in your goals and you must also procure and store valuable assets. As much as possible, the preparation timetable on this needs to be brief and concise. All with a view at how soon you can get up to the barest minimum of survival supplies in the shortest amount of time. Beyond this it is also advisable to make a similar physical plan. Where will your family meet. What are your specific plans in case of natural disaster, fire, home intrusion etc. Run through these plans before hand and you will see that these will prove to be invaluable in the time of crises.
Convert Liquid Savings
If the US dollar collapses, your money will be useless. In order for your savings to be safe, convert a portion of your savings to precious metals and other valuable commodities. Economic collapse survival will NOT be dependent on U.S. dollars. These commodities will become your safety net in these perilous times. These can be utilized as a means of currency or exchanged for valuable currency like Swiss francs in a time of crises. As the value of dollar decreases, silver, gold, and other precious metals will have their value preserved or or even increased dramatically. This means that even if there were another economic recession, or total collapse you would have a means of survival.
Economic collapse survival will not be a problem if you buy your valuable goods beforehand. This will include guns for your personal protection and hunting, as well as basic supplies like food. Foodstuff like legumes and grains can be stored easily for long periods of time. You can also start investing in bottles and tablets for water purification and keep several water bottles handy in case a shortage happens. Basic survival preparedness information is readily available and can be found numerous places online.
Grow Your Food
Raising some animals and growing your own supplies of food will also be great, if you have the wherewithal to do it. This is not an undertaking for the faint of heart. Farming and crop growing is a laborious task with it’s own specialized skill set. Some easier animals to tend are Rabbits and chickens, as they are small and require considerably less work. The chickens can also give you eggs as well, which are a great source of fat and protein, that can be a critical nutritional factor in you surviving economic collapse. In case there will be economic downturns like a depression or double dip recession, producing your own food is an essential skill that you need to have.
Prepare Your First Aid Kit
For economic collapse survival to be possible, you must see to it that you prepare your first aid and sewing kits as well. These are as critical to your survival as similar practical necessities of daily living. These kits are great to have around the house. They are readily available and can be used both for your regular day to day bumps and bruises and for emergencies.
Know the Community You are In
Wherever you might be living, see to it that you know all your neighbors. In case there will be a collapse in the economy, your life will be revolving locally and for you to survive, you will need to work with others and this will start with other families in your area. In many cases in fact community will be the sole determining factor individuals perishing or prospering. And Lastly make a list, or refer back to this mini-tutorial frequently, so that you can be at the forefront of surviving economic collapse.
If you have any dissatisfaction with my content, you can tell me here and I will fix the problem, because I care about every reader and even more so about your opinion!
I want to present you one of the most interesting sites, where you will see new articles daily! www.321gold.com
Recent world crises and the resultant weakening of the global economy has left many fearing the worst. There is talk of a global recession, or worse yet, a complete collapse of the economy.
While it is impossible to say whether such a severe economic downturn is upon us, understanding how to survive a potential economic collapse (whether now or in the future) could save you and your family when the times get tough.
WHAT IS AN ECONOMIC COLLAPSE?
An economic collapse is defined as a severe breakdown of the economy at a national, regional, or territorial level. It is a broad term used to describe bad economic conditions that are not part of the ordinary business cycle of expansion and contraction.
An economic collapse usually signals the start of a significant economic contraction, recession, or depression, which can last months or even many years.
All Americans Will Lose Their Home, Income And Power By May 27, 2025
Watch the video below!
WHAT CAUSES AN ECONOMIC COLLAPSE?
There are various events and circumstances that can trigger an economic collapse, which makes it difficult to attribute it to a single cause. An economic collapse can happen suddenly as a result of an unexpected crisis such as the onset of a war, natural disaster, political unrest, and various other events.
It can also be the culmination of a series of events or ongoing circumstances which signal a weakening and fragility of the economy.
WHAT ARE THE RESULTS OF AN ECONOMIC COLLAPSE?
The results of an economic collapse are equally difficult to predict, as the ripple effects of a severe economic downturn are widespread and impossible to accurately track. Some general and obvious results of an economic collapse are:
A rise in job loss and unemployment.
Loss of value of investment markets which results in the average investor losing significant value in their portfolio.
Slowing of production, and therefore less new innovation, fewer startups, and so forth.
A potential hyperinflationary environment in extreme cases where the cost of basic items increases dramatically.
An increase in poverty which can also lead to crime, civil unrest, and various other social issues.
Widespread business failures leading to shutting down of companies and laying off of staff.
HOW TO PREPARE FOR AN ECONOMIC COLLAPSE
Preparation is key in order to successfully survive an economic collapse. It is important to not become too complacent when the good times are rolling, as you never know when the situation may change for the worse.
Convenience Store Owner Threatens Man At Gunpoint After Hitting His 5th Lottery Winner In 3 Months
Follow these practical guidelines to ensure you are well prepared :
1. KEEP AN EMERGENCY FUND
Having liquid cash safely deposited in a savings account with your bank can be a lifesaver in times of economic crisis. First of it all, it will retain its value while market linked assets such as equities deteriorate.
Secondly, it will provide you with the best liquidity so that you can quickly access your money during a time of extreme need. It is recommended to keep at least 3 – 6 months’ worth of expenses in an emergency fund.
2. BECOME DEBT FREE
The additional pressure of carrying debt if there is an economic collapse can put you in an extremely difficult situation. You should start working towards becoming debt free today.
This will reduce your monthly expenditure and will keep you from landing up in a precarious position should you lose your job in the future. Begin by paying off your highest interest debt such as credit cards and other short-term loans, and then move onto lower interest debts such as house mortgages.
3. CREATE ADDITIONAL INCOME SOURCES
The risk of losing your primary job is elevated during an economic recession or collapse. You can mitigate the negative consequences of this by creating additional sources of income now before the bad times are afoot.
We live in an age of boundless opportunities to make money on the side remotely. You can start your own web business or do freelance consulting work.
Even if you have a great job, it is well worth diversifying your income sources and establishing other ways to sustain yourself. Even a few hundred dollars a month can make a big difference in a time of need.
4. REDUCE UNNECESSARY SPENDING
Most people tend to spend recklessly when times are good and then suddenly try to adjust when there is a downturn or they lose their job. This is a big mistake for two reasons:
Firstly, if you make overspending a habit in your regular life, it becomes extremely difficult to adjust your spending habits when you need to do so. If you practice living with less even during the good times, it will be much easier during a financial squeeze.
Secondly, wasting unnecessary money on a regular basis means you have less to put into savings each month. We spoke about the importance of having an emergency fund, and living off less now can help you keep that fund growing for when the rainy day comes.
5. MAINTAIN A DIVERSIFIED INVESTMENT PORTFOLIO
Entire markets and industries can deteriorate during an economic collapse, while others might be more protected. Maintaining a diversified investment portfolio will ensure that you are not overexposed to one specific asset class, sector of the economy, or graphical region.
While your overall asset value might still decline significantly, you will be more protected from the risk of complete financial ruin if you keep your eggs in different baskets.
6. STOCKPILE FOOD AND OTHER SUPPLIES
During severe economic collapses, like the one experienced by Venezuela in current times, or the Great Depression of the 1930s, even things like basic food and other supplies can be in shortage.
Even if supplies are available, a hyperinflationary environment can make basic necessities completely unaffordable. It is always a good idea to keep a stockpile of food and other essential supplies (e.g., medicines, toiletries, paper supplies, tools, etc.) that can last you more than a year in tough times. This may also protect you from other crises such as natural disasters, war, etc.
One step further is to learn to grow your own food. If you have a small garden in which you could plant a few crops, start learning how to prepare the soil and grow some basic fruit and vegetables. Not only will it make you less reliant on a potentially failing economic system, but will be an extremely rewarding process too.
Watch this video below to find out the great secrets hidden by the government.
7. LEARN BASIC SKILLS
Basic DIY skills are invaluable during an economic crisis. Instead of paying someone to repair your car or fix your house, you can do it yourself for free. You could even earn some additional income by providing these services to others. Examples of basic skills that can save you money and bring great fulfilment during difficult times include things like:
Baking bread and making other foot items from scratch (e.g., pickles, jams, fermented vegetables, yoghurt, etc.)
Growing your own vegetables and herbs
Sewing
First aid and caring for a sick child
Mechanic work such as fixing cars, motorbikes, bicycles, etc.
Building and repairing household items such as furniture and shelves
Basic electrical and plumbing work
8. ESTABLISH STRONG CONNECTIONS
One of your most valuable resources are the people who are close to you. When times are difficult, it is important to work together with close friends and family to overcome the challenges.
You will have a much better chance of making it through compared to trying to tough it out alone. Start building strong relationships with those who are close to you, like neighbours, friends, and family. Having the mutual understanding that you can depend on each other in difficult times is a great comfort.
You can also practice the habit of mutual exchange (i.e., bartering), where you offer your skills in exchange for something that the other can give. This can help you circumvent the traditional economy and help you move more towards the “sharing economy”. This also reminds us of the importance of learning as many basic skills as possible, so that you may help others in need and receive their support in kind.
Hopefully you will be well prepared to deal with an economic collapse when it comes having followed the above steps. However, it is impossible to perfectly predict how a collapse in the economy will play out, and you will need to deal with the situation that is presented to you at the time. Here are a few additional steps you may need to take when you are actually faced with an economic collapse:
1. DISCUSS THE SITUATION WITH YOUR HOUSEHOLD
The very first thing you should do is sit down with the members of your household and discuss the situation with them. Go over your finances together and work together to come up with a plan of how you will navigate these difficult times together.
It is important that you are all on the same page, but also to know that everyone has their own approach and attitude to dealing with money. How you resolve these differences and work together will have a big impact on your ability to deal with the challenging times, and strengthen your relationships in the process.
2. FURTHER REDUCE EXPENSES AS NEEDED
In preparation for a recession, you would have practiced living off less. When you are faced with an actual economic collapse, you may have to further adjust your spending habits to be able to cover your monthly expenses. In most cases, it is quite possible to maintain a good quality of life while cutting out unnecessary expenditures. Start by cutting out spending on all the things which are not necessary for you to live on, and finding ways to reduce the costs of the things you do need. Some ways that you may be able to reduce your spending include:
Cut out discretionary spending (i.e., stop buying things you can do without) like luxury items, new clothes that you don’t need, new gadgets, etc.)
Reduce transportation costs by carpooling, using public transport, walking or cycling, etc.
Reduce housing costs by moving to a cheaper area, subletting out part of your house, or even moving in with family until your financial situation improves.
Reduce food costs by cooking at home instead of going out to eat. Also refrain from buying too many luxury food items that you don’t really need and instead buy simple, healthy food.
3. GET MUTUAL SUPPORT FROM FRIENDS AND FAMILY
We spoke about the importance of building strong relationships when preparing for an economic collapse. Well, here is the time to lean on the solid bonds you have created by not being afraid to ask for support. You should also help and share your skills and resources with others who are in need.
4. PROTECT YOUR HOME AND FAMILY
Extreme economic collapses and recessions can lead to social degradation such as more violent crime, petty theft, scams, and so on. This has been clearly demonstrated in Venezuela and is one of the reasons why so many citizens have fled the country. You may need to take action to safeguard your home and protect your family from criminals and other dangers during a severe recession.
5. KEEP EARNING
If at all possible, make sure to keep the money flowing in. If you have a job, go the extra mile to prove that you are a valuable employee. You should be seen as the last person to be laid off in your employer’s eyes.
First 5 Places In America You Don’t Want to be When Society Collapses!
In the meantime, keep networking and working on generating alternative income streams so that you are not left stranded without any income if your employer does need to shut down.
6. DON’T STOP ENJOYING LIFE
Finally, and most importantly, don’t allow yourself to be ruled by fear and sadness. There is no reason to stop enjoying and appreciating life just because you are faced with economic difficulties.
Be grateful for the things you do still have and keep having fun in the ways you can with those you hold dear. You should try to see the situation as a challenge on your creativity and flexibility, and encourage friends and family to come up with inventive ways to have fun without spending money all the time.
Of all the disasters which can face a society, an economic collapse is one of the most challenging to deal with. Due to its nebulous nature and widespread impacts, it is very difficult to escape its effects. Being adequately prepared to deal with a sever economic downturn before it arises, and knowing how to respond when you are faced with it, is vital in order to make it through intact.
You will probably have to accept that you will be impacted one way or another, but the severity can be greatly reduced with the right approach. Most important of all is to continue living with joy and hope in the midst of the difficult times, and not get sucked into needless fear and anxiety.